
Written by
Anna Yuan
Can't See Files on the USB Drive Mac, How to Fix?
Summary: This post tells how to fix the USB files not showing up on the Mac issue. Before trying the solutions to fix the problem, download iBoysoft Data Recovery for Mac to recover data from your USB drive first to avoid data loss.
In some tech forums, especially in Apple support communities, many users had reported issues where the USB flash drive shows empty but space used when they connect the pen drive to Mac. Here's a real-life example:
I have an 8 GB USB flash drive that when I plug it into my MacBook, the flash drive shows up but files disappeared from the drive. The "get info" tab shows that there are about 5 GB of files stored on the flash drive. How do I recover these files?
When this issue occurs, you can't see any files on USB drives on Mac but only to find the storage space was occupied. So, where do those files go? Is there a solution to get those files back? Luckily, this post will show you solutions regarding USB drives not showing files and folders on Mac. Just keep reading.
Why does the USB show empty but space used on Mac
In general, when you connect a USB flash drive to the Mac, the drive will automatically mount and you can view files on it. However, sometimes your USB flash drive or other external drives files are not showing up on Mac, and the storage space is partially or fully used.
The reasons behind the USB drive showing empty but space used are as follows:
- The Data stored in USB Drive might have got corrupted due to Malware, bugs, or viruses.
- There might be a connection problem in either your USB Drive or the port of your Mac.
- The files in your USB pen drive are intentionally or mistakenly hidden.
Recover lost data from USB flash drive on Mac first
If you didn't back up important data on your USB, you need to conduct data recovery on the USB drive right away when you finally find files are disappeared from the external hard drive on your Mac or from the flash drive. Because any further operation will write new data to the USB drive and overwrite the original data.
When it comes to data recovery, iBoysoft Mac Data Recovery is your best assistant. It is easy to recover lost/missing/disappeared files from unmountable, corrupted, unreadable, inaccessible, formatted USB flash drives, external hard drives, hard disks, sd cards, memory cards, etc.
What's more, it is fully compatible with macOS 12/11/10.15/10.14/1.13/10.12 and OS X 10.12/10.11/10.10/10.9 and works fine with Apple Silicon chips including M1, M1 Pro, and M1 Max chips. It can recognize 1000+ file types, including documents, pictures, music files, videos, emails, etc.
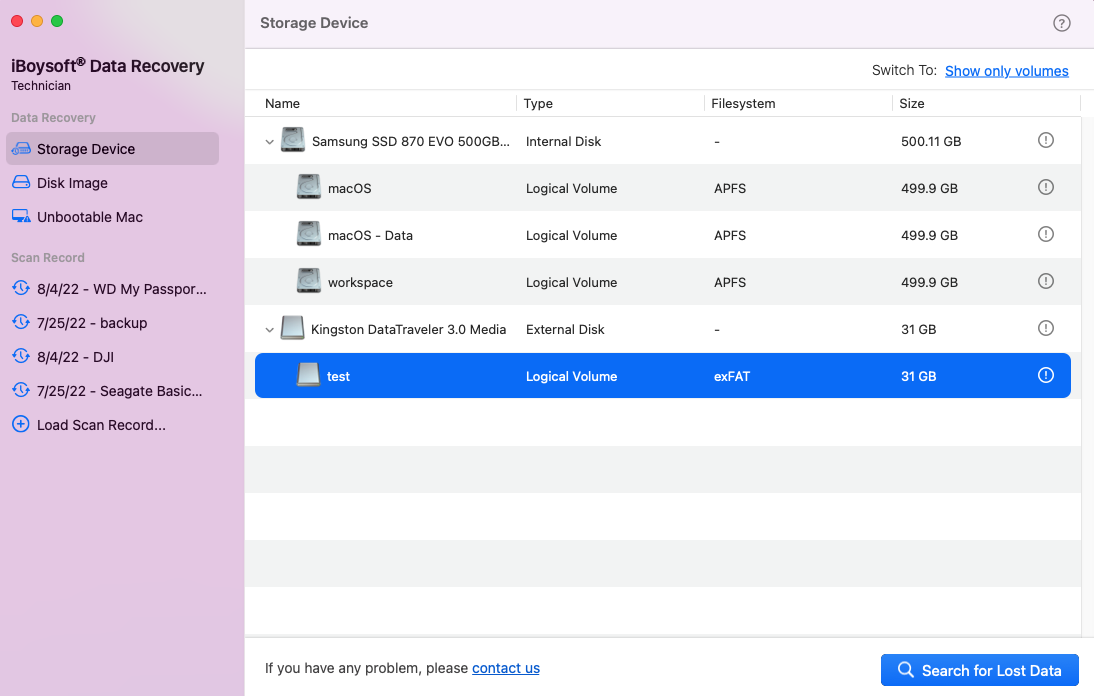
- Connect the USB flash drive that is not showing files on Mac.
- Free download, install and launch iBoysoft Data Recovery for Mac.
- Select the USB drive, then click Search for Lost Data to start scanning for disappeared files.
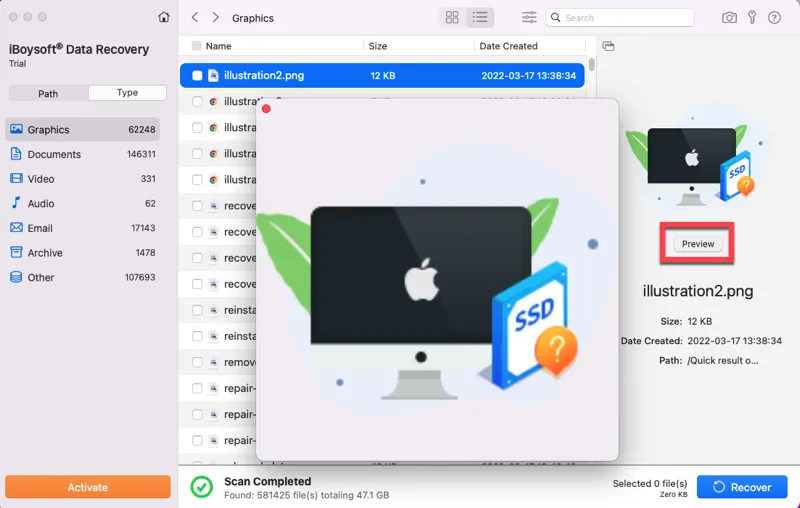
- Preview the scanning results, choose files you want to recover, and then click Recover. Remember to save the recovered files to a different location to avoid data overwritten on this USB.
How to fix USB files not showing up on Mac
After you've recovered all your important files from the USB pen drive, try the next solutions to fix the files or folders on the USB drive not showing up on the Mac issue.
Solution 1: Show hidden files on flash drives
If your Mac is hiding files from you, then you can't see files on USB drives on Mac but the space is occupied. How to see hidden files on the flash drive on Mac? Here are two options:
Option 1: Use a keyboard shortcut
- From the Finder, navigate to any folder where there might be hidden files.
- Now press Command + Shift + Period (.) to instantly toggle to show hidden files.
Option 2: Run command lines
The Terminal is a default Apple application that allows you to make different operations. To show hidden files on Mac using the command line, just follow these 2 steps below:
- Open the Terminal application from Launchpad.
- Copy and paste the following command into the Terminal window, one at a time, pressing Enter key after each one.defaults write com.apple.Finder AppleShowAllFiles truekillall Finder
Note that this command causes the Finder to quit and restart. When the Finder reappears, you will see hidden files if any exist.
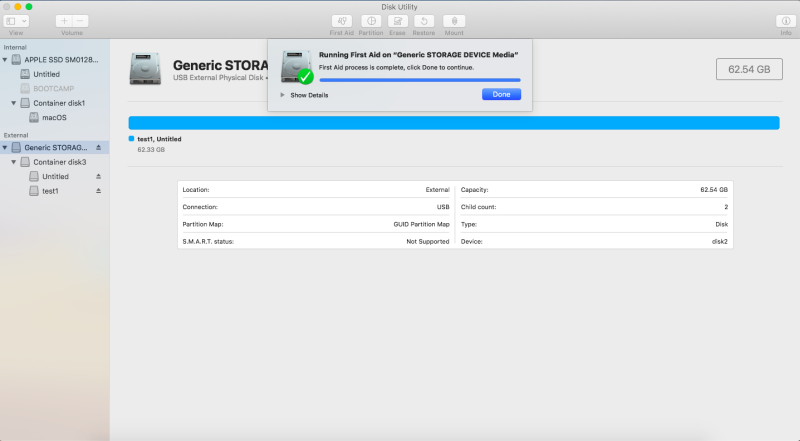
Solution 2: Run First Aid to repair the USB drive
If your USB drive has a corrupted file system that is unrecognized by the operating system, files are not showing on the USB flash drive. First Aid is a built-in tool in macOS to repair disks error, you can try out it.
- Go to Utilities, find Disk Utility, and run this program.
- Click Show all devices in the View option and select this USB flash drive in the left sidebar.
- Click First Aid in the top menu of Disk Utility.
- Click Run to check and repair errors in this drive.
Solution 3: Reformat to fix USB files not showing up on Mac
If the file system of the USB pen drive is seriously damaged, you may fail to repair the USB flash drive on Mac with First Aid. Then, you have to reformat the drive to make it usable again. But this operation will remove all files stored on the USB. Thus, please make sure you have restored the USB data with iBoysoft Data Recovery for Mac like the aforementioned.
Here's how to format USB on Mac:
- Plug your USB drive into your Mac USB port. Your macOS will recognize it and show it up on the desktop.
- Open Launchpad > Other > Disk Utility.
- Select the USB drive at the left sidebar of your Disk Utility window.
- Click Erase at the top.
- Set a name for your USB.
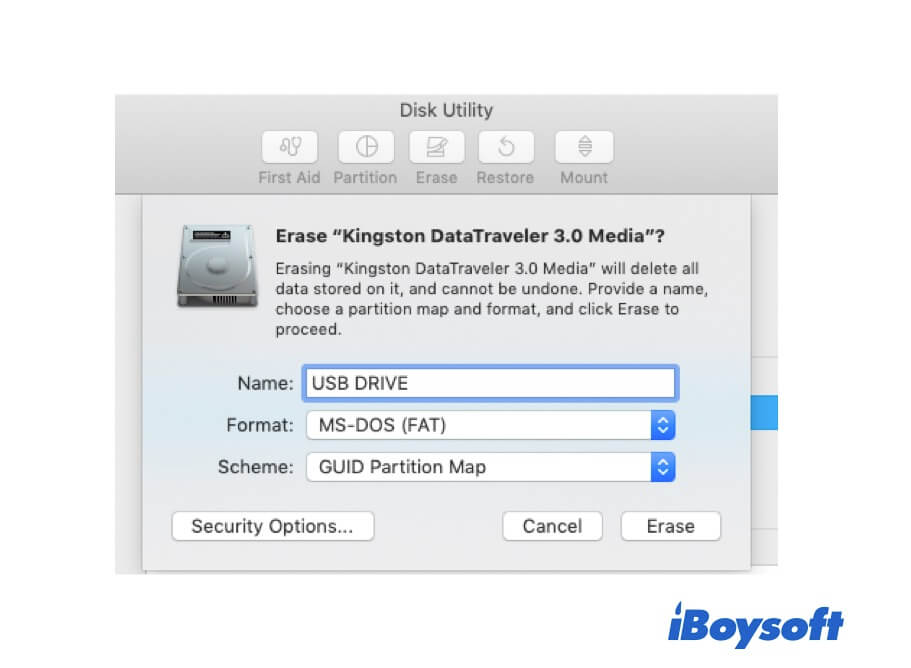
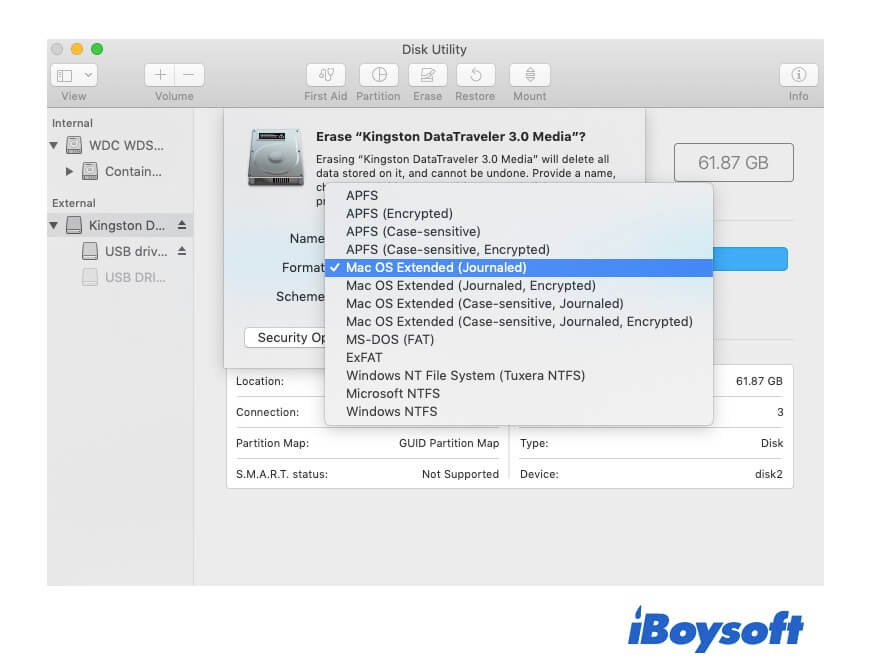
- Choose a format from the drop-down menu and select GUID Partition Map as a scheme.
- Click Erase.
- Wait until the erasing process is done. During this process, don't do other operations on the USB drive. Otherwise, it may be corrupted.
- Once it completes, click Done. Then, quit Disk Utility.
Tips to prevent files disappearing from flash drive
If you don't want to lose files on your USB drive, here are plenty of things you can do to avoid it happening again:
- Always backup your important files on the USB flash drive.
- Do not install any software that is pirated by illegal operators, install software from trusted sources instead. This will not cause any irreparable damage to your USB partitions or files system.
- Try to avoid performing sudden force shutdown on Mac when your USB drive is connected to it as this may cause damage to the pen drive.
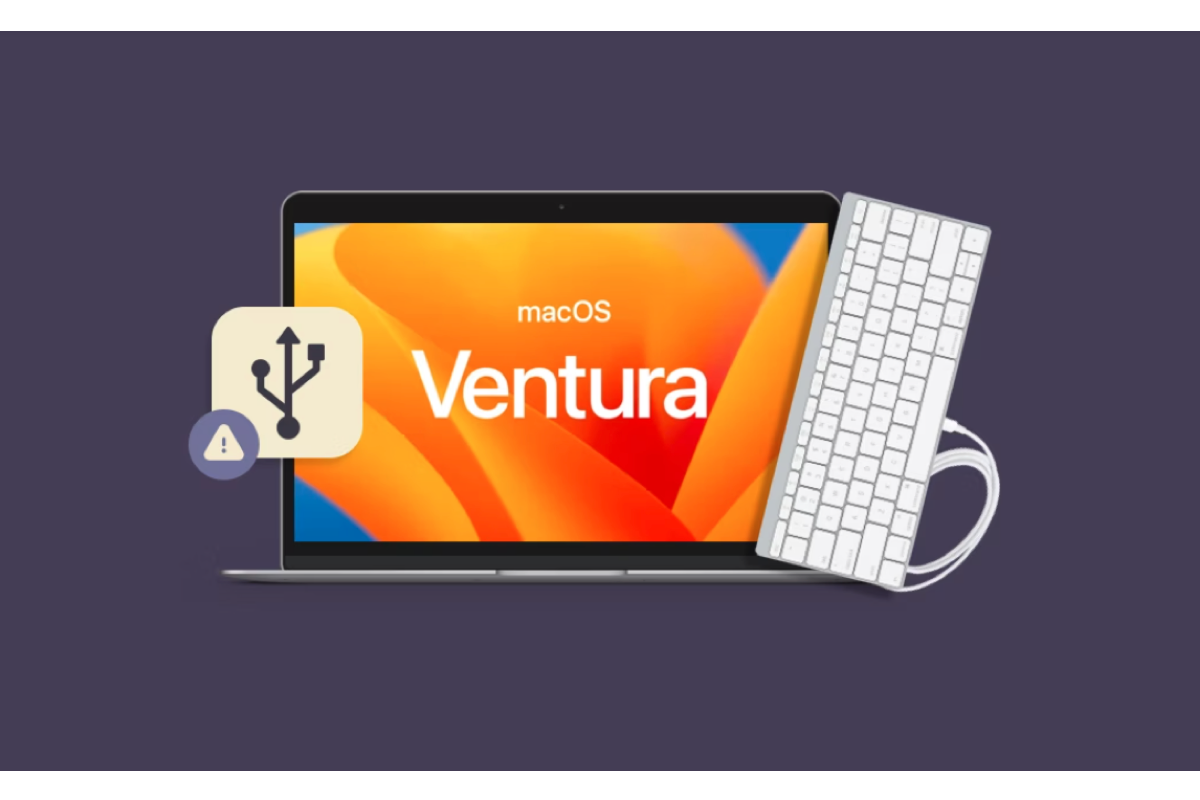
[Fixed!]USB Devices Disconnecting on macOS Ventura
Read this post to know why your USB devices disconnecting on macOS Ventura and then follow the effective methods provided by iBoysoft to make the USB devices reconnect on macOS Ventura. Read more >>
FAQs about the USB flash drive not showing files
A
1. Insert your USB flash drive into your Mac's USB port.
2. Click Finder from the Mac Dock.
3. Click the name of your USB flash drive in the left pane under Locations.
This will open the flash drive and display its contents in the right pane.
A
When you insert a USB drive to your Mac, it appears in the left panel in Finder within Locations. If you go to that location and press Shift + Command + Period, you'll be able to see hidden files on it.