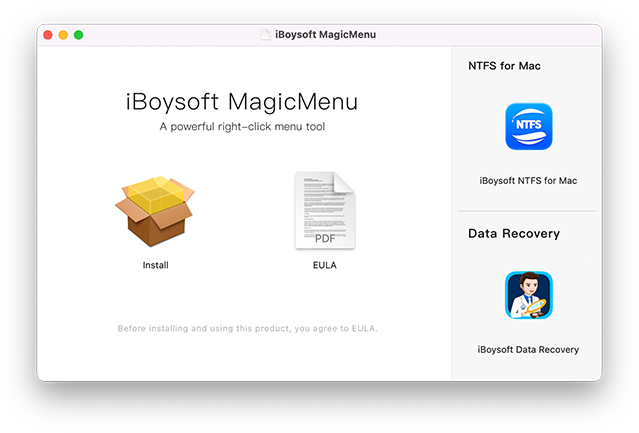
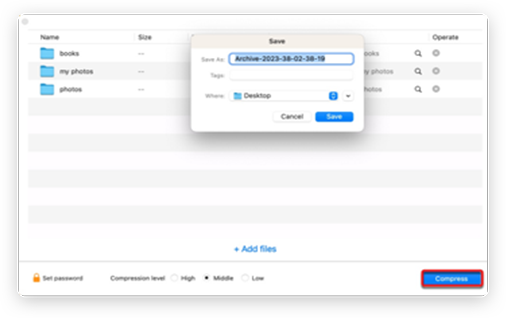
How iBoysoft Mac File Compressor Works

iBoysoft Mac File Compressor is a Finder context menu extension that allows you to zip files with customizable compression levels and encrypt ZIP files on Mac. It can save you time by combining several files into one .zip archive file before sending it with an email, save storage space by reducing file size, and improve data security by password-protecting ZIP files on Mac.

  • Create a ZIP file with multiple documents on a Mac

    Being able to compress multiple items at once is vital for a file compression app. It’s apparent that creating one ZIP file with several documents is way more effective than compressing one file at a time. With that in mind, this file zipper for Mac has made it exceptionally simple to put a bunch of files into a ZIP file.

    1.Create
  • Password protect ZIP file on Mac

    Another great feature of iBoysoft Mac File Compressor is the ability to encrypt ZIP files on Mac. If you’re dealing with important or sensitive information, you can safeguard the archive files on Mac with a password. This way, only those who have the password are capable of expanding the compressed files.

    2.Password protect
  • Customize the compression level of the archive files

    This compressor also lets you choose the compression level, which is handy if you are running out of space, want to speed up the zipping process, or need to make the archive smaller to match the file transfer size limitation. Its default compression level is set to middle compression, which is balanced for size and speed.

    3.Customize

How to Enable iBoysoft Mac File Compression Extension?

iBoysoft File Compressor for Mac is an extension featured in the versatile right-click enhancer iBoysoft MagicMenu, which also arms your Finder context menu with the ability to completely uninstall unwanted apps, copy or move files, create new files, and many more.

Here’s how to download and install it for free to enable the archiver on Mac:

  • 1

    Click the button below to download iBoysoft MagicMenu for free.

  • 2

    Double-click to extract the downloaded archive file.

  • 3

    Open the magicmenu.dmg file and double-click the package icon above Install.

  • 4

    Follow the onscreen instructions to install the app.

Once you have installed the app, it will automatically open. Selecting "Extensions" from the left sidebar will reveal the pre-installed iBoysoft Archive Utility for Mac.

How to Compress Files on Mac with iBoysoft Mac Extension?
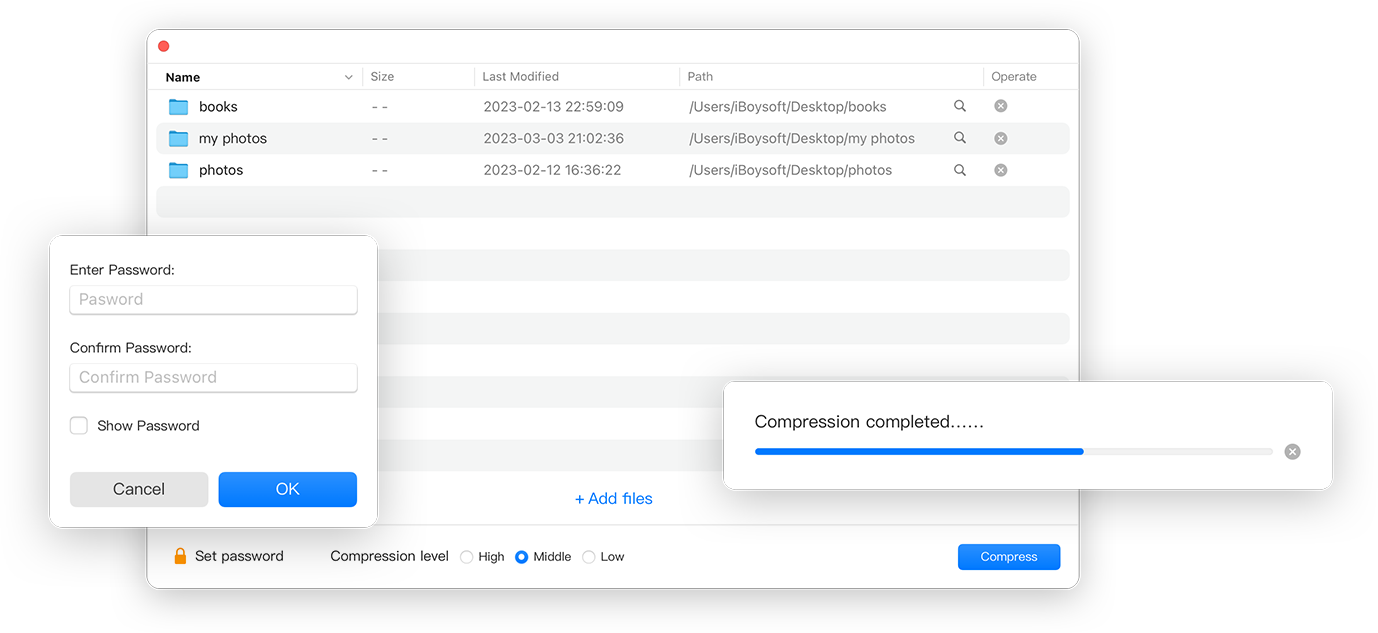
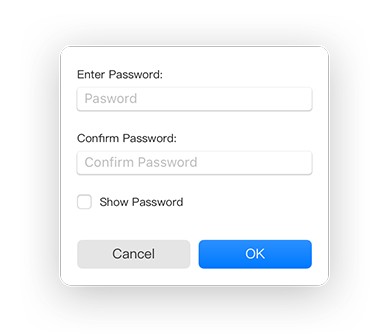
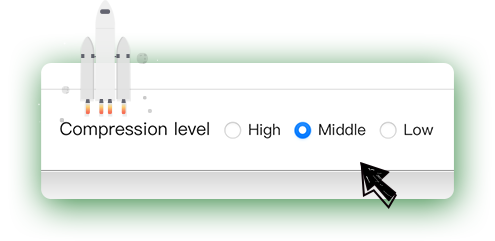
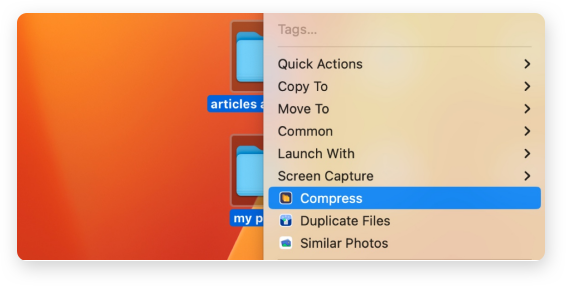
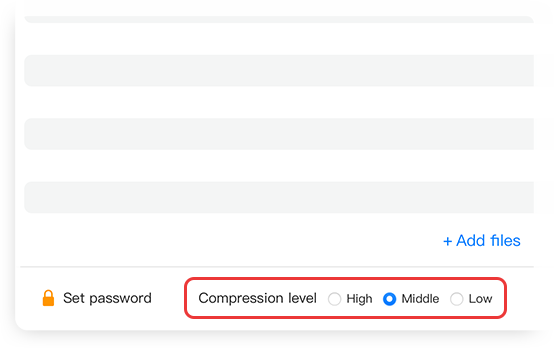
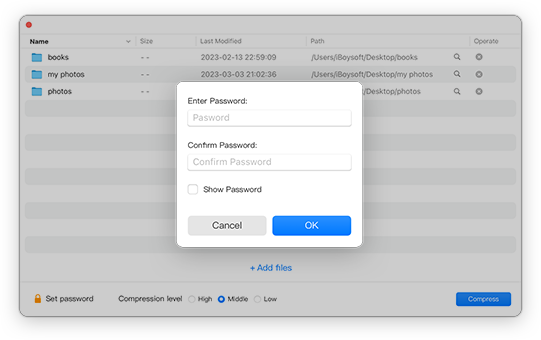
With this iBoysoft Mac File Compressor extension, you can compress folders and files with the ZIP archive format in 4 steps or less.

step1

Right-click selected files and tap "Compress"

To compress multiple items at once, you can select them using the Shift or Command key if it’s convenient, then right-click or control-click them and tap the Compress button. Otherwise, just right-click one file or folder you want to compress, click Compress, then tap the "Add files" button or drag and drop to include other files for compression.

step2

Choose a compression level

There are three compression levels to choose from. The higher the level, the smaller the archive size and the slower the compressing speed. The differences made by your choice of compression level aren’t great if you are zipping small files. But it certainly makes a big difference on large files, especially single large files.

  • High level: Select this option to create archive files on Mac with a smaller file size.
  • Middle level: This is the default option.
  • Low level: Select this option to compress folder or files at a faster speed.
step3

Set a password for the compressed files

To encrypt ZIP files on Mac, click the yellow lock next to "Set password," then enter your password twice and tap OK.

step4

Click Compress to start file compression

Tap the Compress button, choose a location, then wait for the tool to archive files on Mac. When finished, it will automatically display and highlight the .zip archive file in its folder.

FAQ about File Compression on Mac

A

Here’s how to zip a folder with Terminal on Mac:
1. Open the Terminal app.
2. Execute this command: zip -r archive_name.zip folder_path
Note that you need to replace archive_name with the name you want to use with the compressed ZIP file and folder_path with the path of the folder you intend to compress.

A

You can compress files without losing quality by zipping them. The ZIP archive format reduces file size while still allowing you to expand to the original files, ensuring that quality is maintained.

A

To compress file size on Mac, you can take the following steps:
1. Download and install iBoysoft MagicMenu.
2. Right-click the 40GB file and select Archive.
3. Select a proper compression level.
4. Click Compress.

A

If you can’t compress files on your Mac, you likely don’t have the permission to do it. Check the Sharing & Permissions setting in Get Info and ensure you have Read & Write privilege to the files. Suppose it’s still not working; then use iBoysoft Free File Compressor to make ZIP files on Mac.

A

File compression is a way to reduce file size to save disk space and facilitate faster file transmission over the internet. There are two types of compression: lossless compression and lossy compression.
The typical format of a lossless compression is ZIP, which replaces similar or repetitive data and patterns in a file with a unique identifier much smaller than the original word to reduce the overall size of the file and reverse these changes when unzipping the file.

A

Here’s how to compress a 40GB file on Mac:
1. Download and install iBoysoft MagicMenu.
2. Select the files you want to compress, right-click on them, and click Archive.
3. Choose a compression level.
4. Click Compress.

iBoysoft News & Tips

incompatible disk features not supported on this version of macos

Fix macOS Incompatible Disk Error Features not Supported

Correctly reformat the disk to fix theerror incompatible disk this disk uses features that are not supported on this version of macOS after downgrading macOS or booting up from an external drive.

News Tips

How to open webloc files

What is Webloc file & How to Open Webloc Files [Windows/Mac]

Learn what a .webloc file is and how to open .webloc files on Windows 10/11, Mac, iPhone, or Android. Also, get familiar with the ways to convert .webloc to .html or .url.

News Tips

upgrade mac hdd ssd without losing data

How to Upgrade Mac HDD/SSD Without Losing Data

This post guides you to upgrade the HDD or SSD on your MacBook Air/Pro/iMac without losing data. Even if it is a Mac with an irreplaceable drive, you can upgrade it by booting Mac from an external SSD

How to Tips

Bootable USB not showing up on Mac

Bootable USB Not Showing Up on Mac/Startup Manager? (Fixed)

Bootable USB not showing up in Startup Manager? Learn the reasons behind and 12 ways to fix Mac not detecting bootable USB.

How to Tips

How to Use Apple Notes on Mac

How to Use Apple Notes on Mac Air/MacBook Pro?

Apple Notes is a wonderful built-in tool that enables you to write down certain things. This article offers you a full guideline on how to use Apple notes on Mac.

Wiki Tips