
Written by
Connie Yang
Fusion Drive Not Mounted on Failed/Dead iMac, How to Fix
Summary: If your iMac is unbootable, this post will tell you how to fix the Fusion Drive that's not mounting in macOS Recovery Mode. More importantly, it will guide you to use iBoysoft Mac Recovery Mode to recover data from your unmounted Fusion Drive. Then, you can avoid permanent data loss.
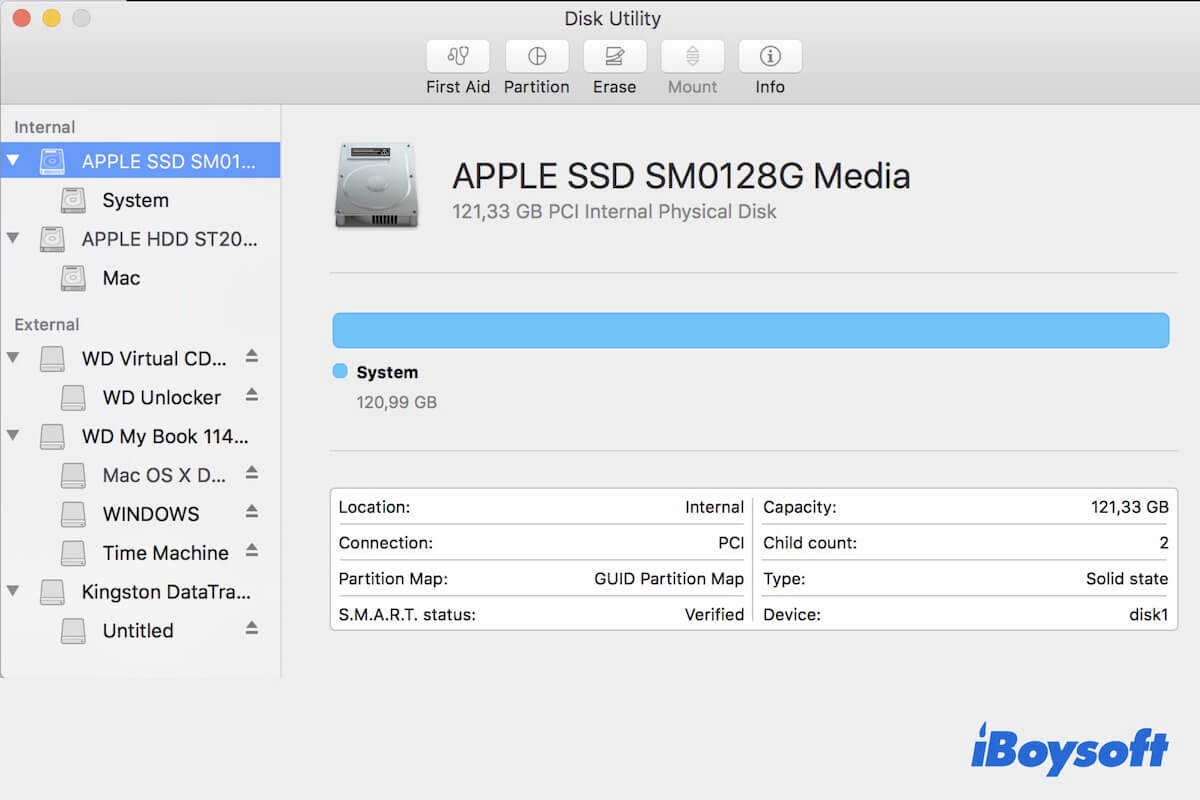
Your iMac won't turn on and you go to macOS Recovery Mode to search for clues and do some checks, only to find the Fusion Drive is not mounted in Disk Utility.
Or, you take out the HDD or SSD portion of the Fusion Drive from a dead Mac and put it into an external enclosure, and then connect this external disk to another healthy Mac for data recovery, but find that the hard drive cannot be mounted.
If you don't know how to get out of the trouble, stick around. This article will offer you tried-and-true ways to fix the iMac Fusion Drive not mounting issue. Then, you can boot up your Mac again.
Quick fixes to fix Fusion Drive not mounting in Disk Utility in macOS Recovery Mode:
- Mount the Fusion Drive with the Terminal
- Run Disk Utility First Aid to repair the Fusion Drive
- Use Terminal to fix the unmounted Fusion Drive
- Fix the unmounted Fusion Drive with FSCK
- Reset NVRAM
- Enter Safe Mode
- Erase the Fusion Drive and reinstall macOS
Are these ways workable? Share them with your followers.
Recover data from the unmounted Fusion Drive (The priority)
Note: When a hard drive is not mounting but can show up in Disk Utility, it means that the drive has some file system or software issues that may be fixed. In that circumstance, you'd better recover data from the disk as soon as possible in case of more serious problems with it. Or else, there is nothing you can do but face permanent data loss.
To recover files from the unmounted Fusion Drive, also the internal hard drive of your unbootable iMac, you have no other choice except to use professional data recovery software.
iBoysoft Mac Recovery Mode is the fastest and easiest-to-operate tool that is specially designed to help you recover lost files from an unbootable, inaccessible, or dead Mac machine. With this special mode, you don't need to take out the internal hard drive from your failed Mac or create a bootable USB installer for data recovery.
Here's how to use iBoysoft Mac Recovery Mode to recover data from the unmounted Fusion Drive:
- Completely shut down your Mac.
- Restart your Mac and simultaneously press down the Command + Option + R shortcut keys.
- Release the keys until you see a spinning globe appear on your screen.
- Ensure your Mac is connected to the internet well as iBoysoft Data Recovery will be downloaded and run from its server.
- Open Utilities > Terminal in macOS Recovery Mode.
- Copy and paste the following command into the Terminal window and press Return. sh <(curl http://boot.iboysoft.com/fdboot.sh)
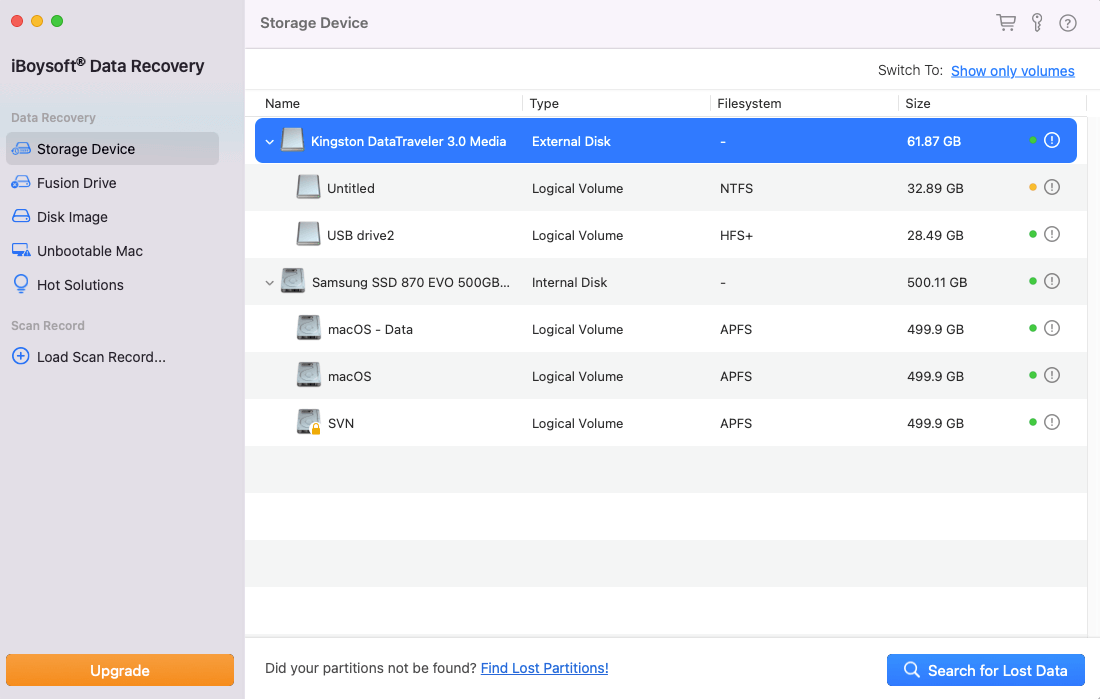
- On the iBoysoft Data Recovery main interface, if your Fusion Drive is not split into SSD and HDD, directly select the entire Fusion Drive and click Search for Lost Data.
If your Fusion Drive is split into SSD and HDD, select Fusion Drive from the iBoysoft Data Recovery sidebar. You'll see the SSD and HDD of the Fusion Drive are automatically listed here, then click Search for Lost Data.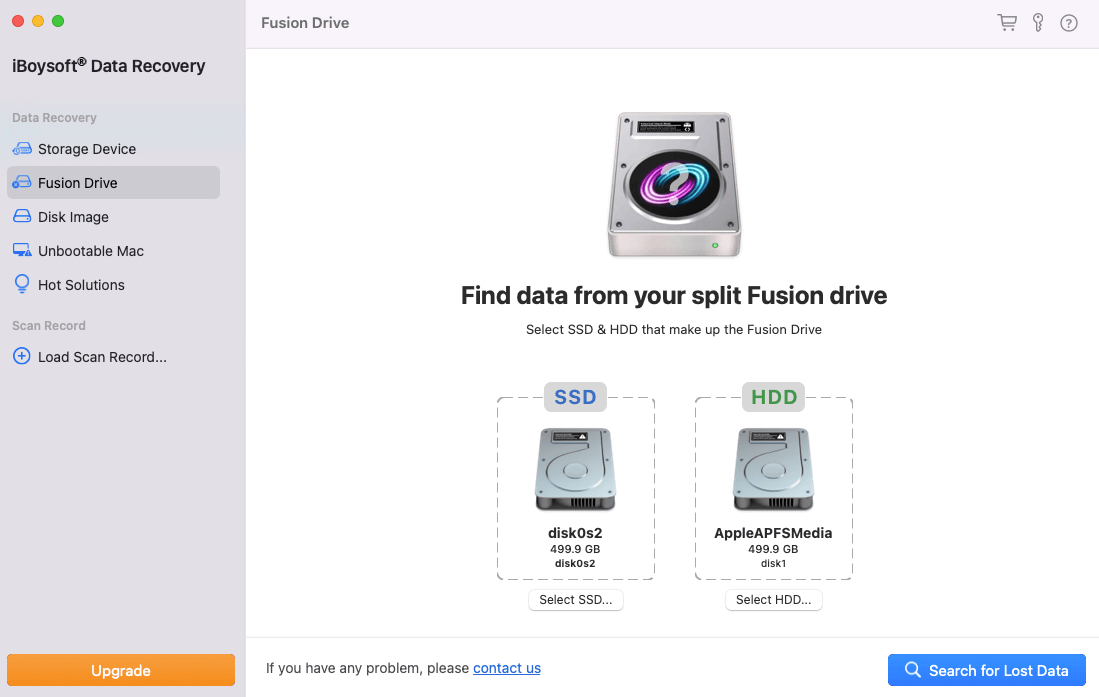
- Wait for the scanning process to finish and browse the results.
- Connect an external hard drive to your Mac, preview and select your wanted files, and then click Recover to save them to the external drive.
Now, you get back your data from the unmounted Fusion Drive. If you think this tool is helpful, share it with more people.
iMac Fusion Drive not mounting in macOS Recovery Mode, how to fix it?
After rescuing data from your iMac Fusion Drive, you can be relaxed to fix the Fusion Drive that won't mount in Disk Utility.
If you've already tried manually mounting the Fusion Drive in macOS Recovery Mode but failed, follow the 7 proven solutions below.
Mount the Fusion Drive with the Terminal
If you can't mount the Fusion Drive in Disk Utility in macOS Recovery Mode, you can use Terminal to force mount the Fusion Drive.
- Open Utilities > Terminal in macOS Recovery Mode.
- Enter diskutil list to find the Volume Identifier of the Fusion Drive.
- Enter the following command to mount the Fusion Drive; you need to replace disk0 with the Volume Identifier of the Fusion Drive. diskutil mount /dev/disk0
Run Disk Utility First Aid to repair the Fusion Drive
Maybe some of you have tried using Disk Utility First Aid in macOS Recovery Mode to check and repair the possible errors on the Fusion Drive that cause it to not be mounted.
If you still haven't attempted this way, follow these steps:
- Enter macOS Recovery Mode. (If you are in, skip this step).
- Click Disk Utility.
- Select the Fusion Drive on the sidebar and click First Aid.
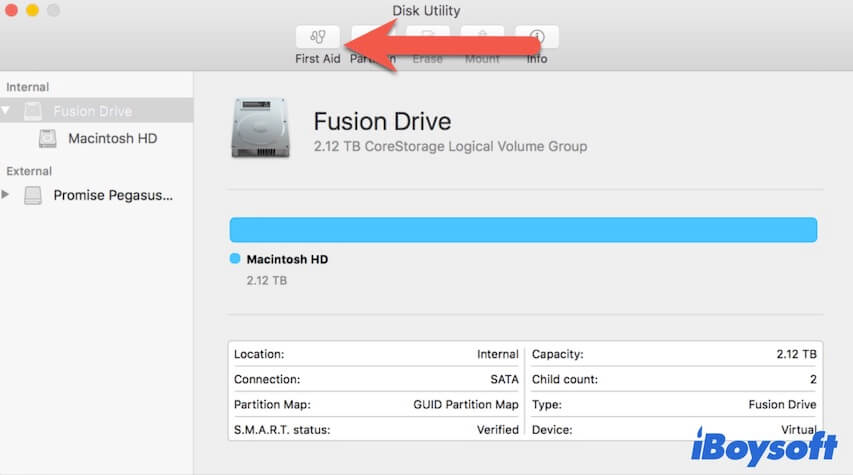
- Click Run on the pop-up confirmation window and wait for First Aid to complete checking and repairing.
If the Fusion Drive is split into two drives, run First Aid to check them separately. Then, you can reboot your Mac to see if it can start or not. If First Aid alerts no errors are found, try the next workaround.
Use Terminal to fix the unmounted Fusion Drive
If the file system errors on your Fusion Drive cannot be fixed by First Aid, you can use Terminal to fix them.
- Start your Mac in macOS Recovery Mode again. (If you are in, skip this step)
- Select Utilities > Terminal from the top menu bar.
- Enter diskutil list to list all the available volumes and check the Fusion Drive's Volume Identifier.
image - Type in the command below. Here, you need to replace XX with the Fusion Drive's volume identifier like disk0. diskutil repairvolume /disk XX
Fix the unmounted Fusion Drive with FSCK
FSCK or file system consistency check is used to check the consistency of a file system in Unix OS or similar. You can also use it to check the errors in the file format of your iMac Fusion Drive in macOS.
Here's how:
- Reboot your Mac and immediately press down the Command + S keys together to boot your Mac into Single User Mode.
- When you see the command-line interface, copy and paste this command: /sbin/fsck -fy
- If the hint "File system was modified" shows up, re-enter this command again until you see "The volume [disk name] appears to be OK".
- Enter reboot to restart your Mac model.
Reset NVRAM
Although NVRAM controls system-related settings to make your Mac start quickly and run properly, you can reset it when your Mac won't turn on. When it fixes the Mac unbootable issue, it then fixes the Fusion Drive that's not mounting.
- Turn off your Mac and wait a moment.
- Press down the power button and meanwhile hold down the Option + Command + P + R shortcuts together for 20 seconds.
- Release all the keys when you hear the startup sound out the second time.
Enter Safe Mode
When Safe booting your Mac, it will quickly check your Mac hard drive (namely the Fusion Drive) before letting your Mac fully start. Moreover, during this process, some system settings will be cleaned up and re-created as well.
So, booting your Mac to Safe Mode is also a possible method to enable the unmounted Fusion Drive to be mountable again.
To boot your Intel-based iMac into Safe Mode:
- Turn off your Mac and wait for about 10 seconds.
- Restart your Mac and press down the Shift key at the same time.
- Release the Shift key when the login screen appears.
Erase the Fusion Drive and reinstall macOS
If the mentioned ways fail to fix the iMac Fusion Drive not mounting issue, the drive probably is seriously corrupted. In that case, you have to erase all the content on the disk and then reformat it.
Nevertheless, data loss will happen if you directly erase the Fusion Drive. So, you need to use a data recovery tool like iBoysoft Mac Recovery Mode to fix a split Fusion Drive without losing data.
Then, follow these steps to erase your Fusion Drive and reinstall macOS:
- Startup your iMac into macOS Recovery Mode.
- Click on Disk Utility.
- Select the Macintosh HD volume from the sidebar in Disk Utility and then click Erase.
- Right-click the Macintosh HD - Data volume and select Delete APFS Volume.
- If your Fusion Drive is split and both the HDD and SSD are listed on the Disk Utility sidebar, erase them one by one.
- Back to the utilities window and select Reinstall macOS.
- Follow the onscreen instructions to finish system installation and setup.
If this post helps you resolve the Fusion Drive that's not mounted on your iMac, share it with others.
FAQs about Fusion Drive not mounting
A
You can enter macOS Recovery mode to run Disk Utility First Aid to check and repair the internal hard drive. If it is useless, try erasing your Mac and reinstall macOS.
A
To force a hard drive to mount on a Mac, you can go to Disk Utility and click the Mount option to mount it. Also, you can go to Terminal and run diskutil mount /dev/xx to force mount the disk. You need to replace xx with the hard drive’s Volume Identifier.