
Written by
Jenny Zeng
Mac Diskutil Commands Explained | diskutil list/erase/apfs/repair
Summary: In this article from iBoysoft, you'll learn how to use the diskutil command with various verbs to manage internal or external disks/partitions in Terminal. It discusses the following verbs: diskutil list, diskutil apfs, diskutil erase, diskutil mount/unmount, diskutil repair, and diskutil eject.
Many Mac users are familiar with the disk management tool built in macOS - Disk Utility. But only a few know its command-line counterpart - diskutil. Essentially, diskutil is the raw and more advanced version of Disk Utility.
Combined with the appropriate verb and parameters, it can perform the same tasks available in Disk Utility but with more control. In addition, it allows you to go beyond what's available in Disk Utility.
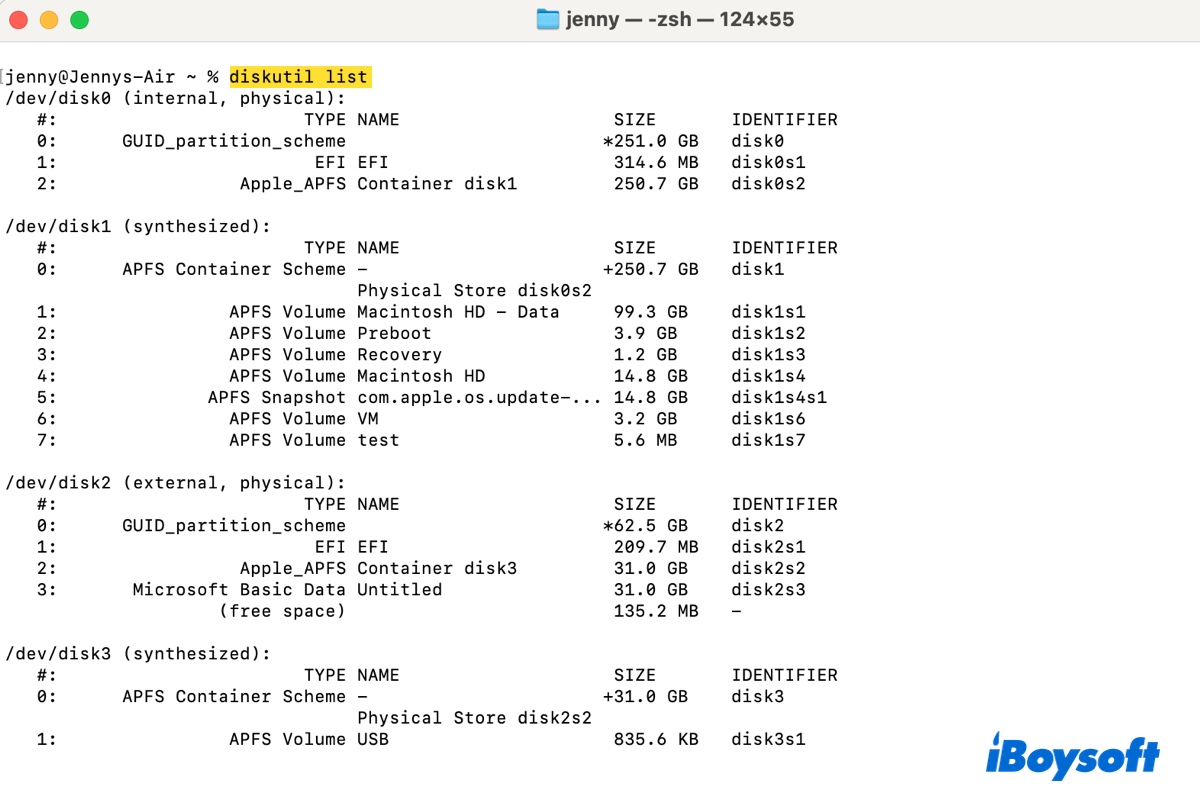
For instance, running the command diskutil list will list all disks on your Mac, including the hidden partitions like EFI, Preboot, or Recovery HD, with detailed information, which Disk Utility only partially displays.
The versatility and power of diskutil make it a great tool for managing disks and partitions on Mac. However, incorrect usage may cause unintended data loss and other issues.
That's why we made this post to help you. It will cover the basic functions you may want to perform on a disk, such as listing, erasing, repairing, mounting, unmounting, or ejecting a disk/partition in Terminal.
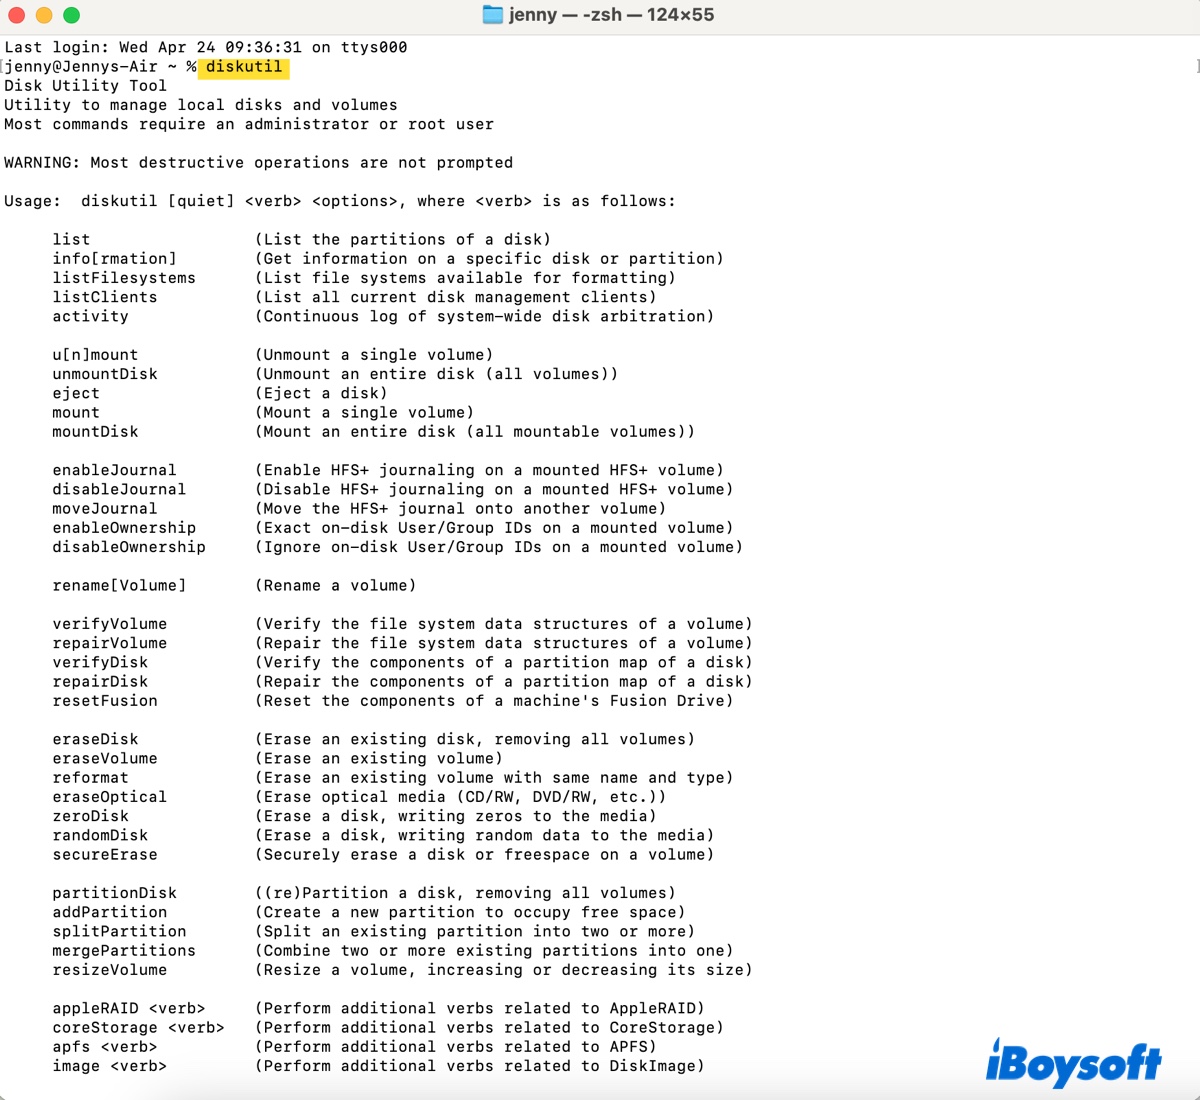
Tips: Running "man diskutil" in Terminal will reveal the man page of diskutil, containing all the verbs and options that can be used with explanations. If you run diskutil only, Terminal will print all the verbs that can be employed with it in a summary.
diskutil list: list disks on macOS
The verb "list" can list all internal and external disks connected to your Mac, including the physical disks, their partitions, and virtual disks like disk images. You can limit the number of disks showing by using a filter argument, such as internal, external, physical, corestorage, or virtual.
Listing the drive information is the first step for operating on a disk or partition, as it shows you the disk identifier of the one you wish to work with.
To see all disks and partitions on macOS, including Boot Camp partitions:
diskutil list
If a disk isn't detected by macOS, it won't appear in Terminal, resulting in diskutil list not showing all drives.
If it says "diskutil list: command not found," try the solutions in this guide: [Fixed] Mac Command Not Found Error in Terminal
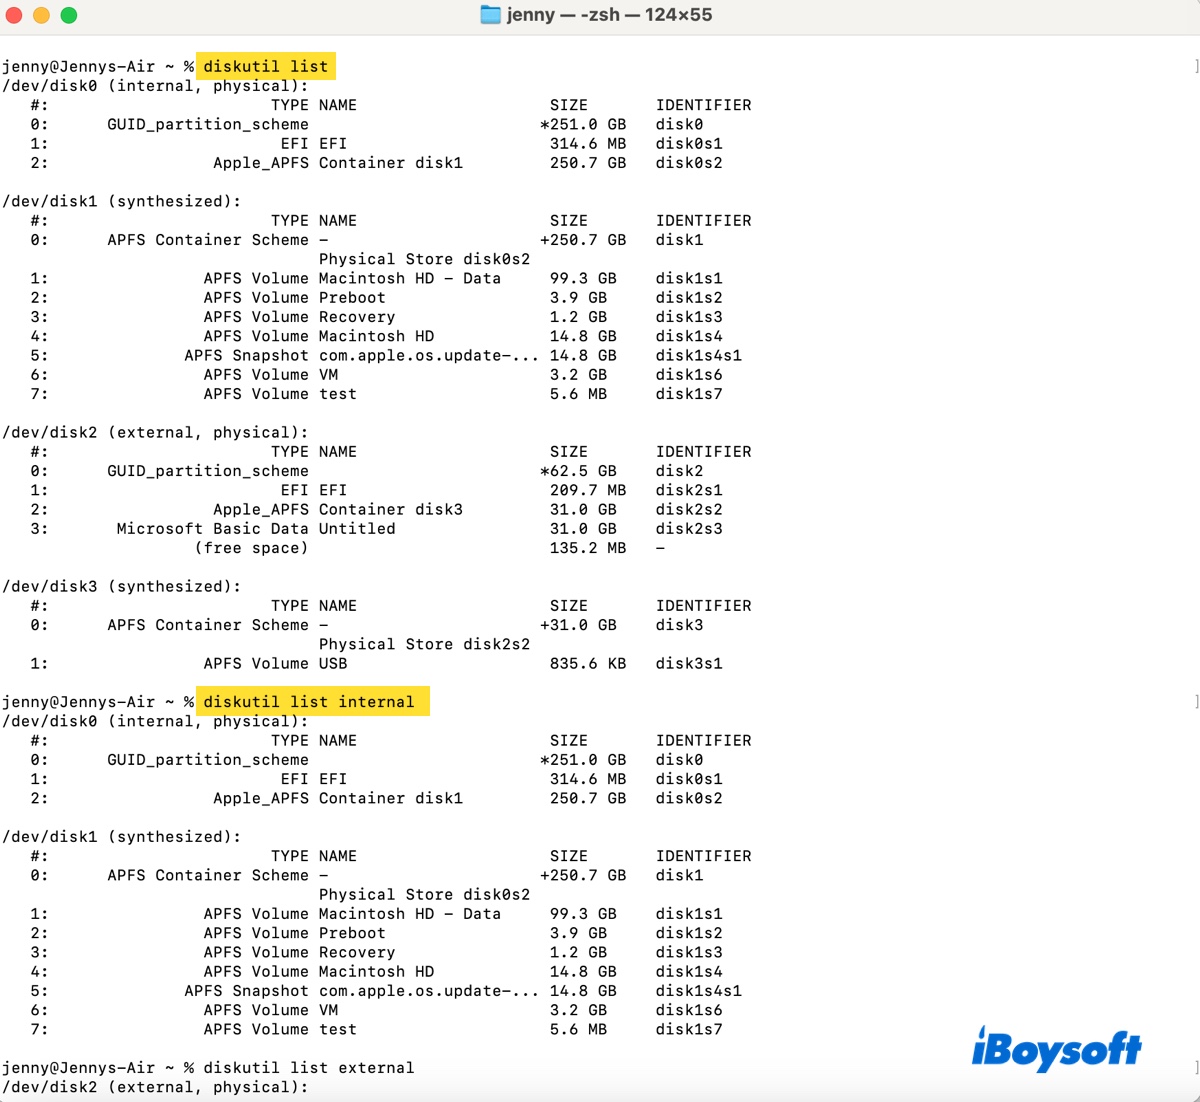
To see only internal disks on macOS:
diskutil list internal
To view only external disks on macOS:
diskutil list external
To display disk information for a specific disk:diskutil list diskX
To list all Cores Storage Logical Volume Groups, Physical Volumes, Logical Volume Family, or Logical Volumes:diskutil cs listor
diskutil corestorage list
If there are no Core Storage volumes on your Mac, Terminal will return the message, "No CoreStorage logical volume groups found." This occurs in one of three situations: 1) Your Mac doesn't have a Fusion Drive; 2) The Fusion Drive is split; 3) The Fusion Drive is formatted in APFS.
Note: You'll notice the asterisk and plus sign in the Terminal output. The asterisk (*) means a physical disk and the plus sign (+) indicates a virtual disk.
The commands in the following sections often require the disk identifier of the target disk or partition. Before executing, remember to replace the general specs with the identifier of your drive.
diskX: The disk identifier of your drive, disk2.
diskXsX: The identifier of a volume or partition, disk2s2.
container_diskX: The disk identifier of the APFS container, disk3.
Remember to back up the crucial files before erasing or deleting a volume or disk!!!!
diskutil apfs: manage APFS volumes on macOS
APFS is the default file system for Macs running macOS High Sierra and later. You can utilize APFS verbs to list, resize, unlock, add, or delete volumes in Terminal.
To check details of APFS containers and partitions: (UUID, FileVault encryption)diskutil apfs list
To resize an APFS container: (This may lead to data loss if the new container size isn't large enough to accommodate the existing data.)
diskutil apfs resizeContainer container_diskX size
If you need to resize an APFS container identified as disk2 to 100 GB, the command would be: diskutil apfs resizeContainer disk2 100GB
To unlock an encrypted APFS volume:
diskutil apfs unlockVolume diskXsX
If you want to unlock an APFS volume with the identifier disk3s1, the command should be: diskutil apfs unlockVolume disk3s1
To update the Preboot volume of an APFS container:
diskutil apfs updatePreboot container_diskX
If you need to update the reboot volume of your system volume, run: diskutil apfs updatePreboot /
To add an APFS volume:
diskutil apfs addVolume container_diskX APFS name
To delete an APFS volume:
diskutil apfs deleteVolume diskXsX
To delete an APFS container:
diskutil apfs deleteContainer containerDiskX
Tips: To learn more about the usage of "diskutil apfs," run diskutil apfs in Terminal. If you're unsure how to use an APFS verb like "deleteContainer", check its examples in Terminal by executing: diskutil apfs deleteContainer
Use diskutil to erase disks on macOS
It's also a common practice to erase a disk or partition in Terminal using the diskutil command.
To erase a disk:
diskutil eraseDisk format name GPT diskX
Format a disk (disk2) to APFS with the name USB:diskutil eraseDisk APFS USB GPT disk2
Format a disk (disk2) to Mac OS Extended (Journaled) with the name USB Drive:diskutil eraseDisk JHFS+ "USB Drive" GPT disk2
Format a disk (disk2) to exFAT with the name USB:diskutil eraseDisk exFAT USB GPT disk2
Format a disk (disk2) to FAT32 with the name USB External Drive:diskutil eraseDisk FAT32 "USB External Drive" GPT disk2
Note: You can change GPT in the command to MBR as well. Here, GPT is used because it's generally preferred for most modern uses and is needed for disks larger than 2TB.
To erase a partition:
diskutil eraseVolume format name diskXsX
diskutil mount/unmount: mount/unmount a disk on macOS
To mount a disk on macOS:
diskutil mountDisk diskX
To mount a partition on macOS:
diskutil mount diskXsX
These commands apply to both internal and external disks. For instance, if you need to mount the EFI partition on Mac, use: diskutil mount disk0s1
Also read: How to (Force) Mount External Hard Drive on Mac? (Terminal)
To unmount a disk on macOS:
diskutil unmountDisk diskX
To unmount a partition on macOS:
diskutil unmount diskXsX
diskutil repair/verify: fix disks on macOS
To verify the file system data structures of a disk:
diskutil verifyDisk diskX
To verify the file system data structures of a partition:
diskutil verifyVolume diskXsX
To repair a corrupted disk:
diskutil repairDisk diskX
To repair a corrupted partition:
diskutil repairVolume diskXsX
diskutil eject: safely eject a disk on macOS
Ejecting external drives from the desktop doesn't always work and is slower than doing it in Terminal. That's why I prefer ejecting drives using the diskutil eject command.
diskutil eject diskX
Share these Mac diskutil commands!