
Written by
Sherry Song
How to Use Chkdsk Commands to Repair Hard Drives?
Summary: CHKDSK is a useful computer tool used in the Windows operating system. Here we will give a brief introduction of CHKDSK commands, how to use CHSDSK on your PC, and how to repair hard drive errors with it.
CHKDSK, short for "Check Disk", is a powerful built-in utility in Windows that helps diagnose and repair errors related to the file system and disk, especially the hard drive for corrupted files, repairs bugs, and errors.
Learning how to run CHKDSK can be crucial for maintaining the health and integrity of your computer's storage. Here also includes some basics for the common CHKDSK commands.
What does CHKDSK do?
What does CHKDSK do? CHKDSk scans the file system for errors such as bad sectors, lost clusters, and directory errors. By detecting and fixing the issues below, CHKDSK helps prevent data loss and ensures the smooth operation of your computer:
- File system integrity checks include the Master File Table(MFT) for NTFS volumes or the File Allocation Table(FAT) for FAT volumes.
- Disk surface scans like the physical disk surface for bad sectors.
- Fix file system errors including cross-linked files and lost clusters...
- Optimizing disk performance by rearranging file fragments and consolidating free space.
Overall, CHKDSK plays a crucial role in maintaining the health and integrity of the disk and file system on Windows computers. Do you wanna know what the common CHKDSK commands are? Keep reading.
Common CHKDSK commands and functions
Here are lists of the common CHKDSK commands and their functions:
| Parameter | Function |
| /F | Fix errors on the disk |
| /R | Locate bad sectors and recover readable information |
| /X | Force the volume to dismount before the scan begins |
| /B | Re-evaluate bad clusters on the volume |
| /V | Display verbose output, providing detailed information about each stage of the scan |
| /L: size | Change the size of the log size |
| /SCAN | Scan the integrity of the file system without attempting repairs |
After CHKDSK has finished scanning and repairing errors on a disk, it provides an exit code that indicates the outcome of the operation:
| Exit Code 0 | No errors or need for any repairs |
| Exit Code 1 | Some errors have been resolved |
| Exit Code 2 | Some errors could not be resolved successfully |
| Exit Code 3 | Big errors even the whole process can't be finished |
Depending on the exit code received, users may need to take further action. And there are other common CHKDSK commands, if you know, leave your known answers.
How to run CHKDSK on Windows?
Now let's begin how to use CHKDSK on your Windows computers with command prompt/File Explorer/an installation media, choose your suitable and preferred one:
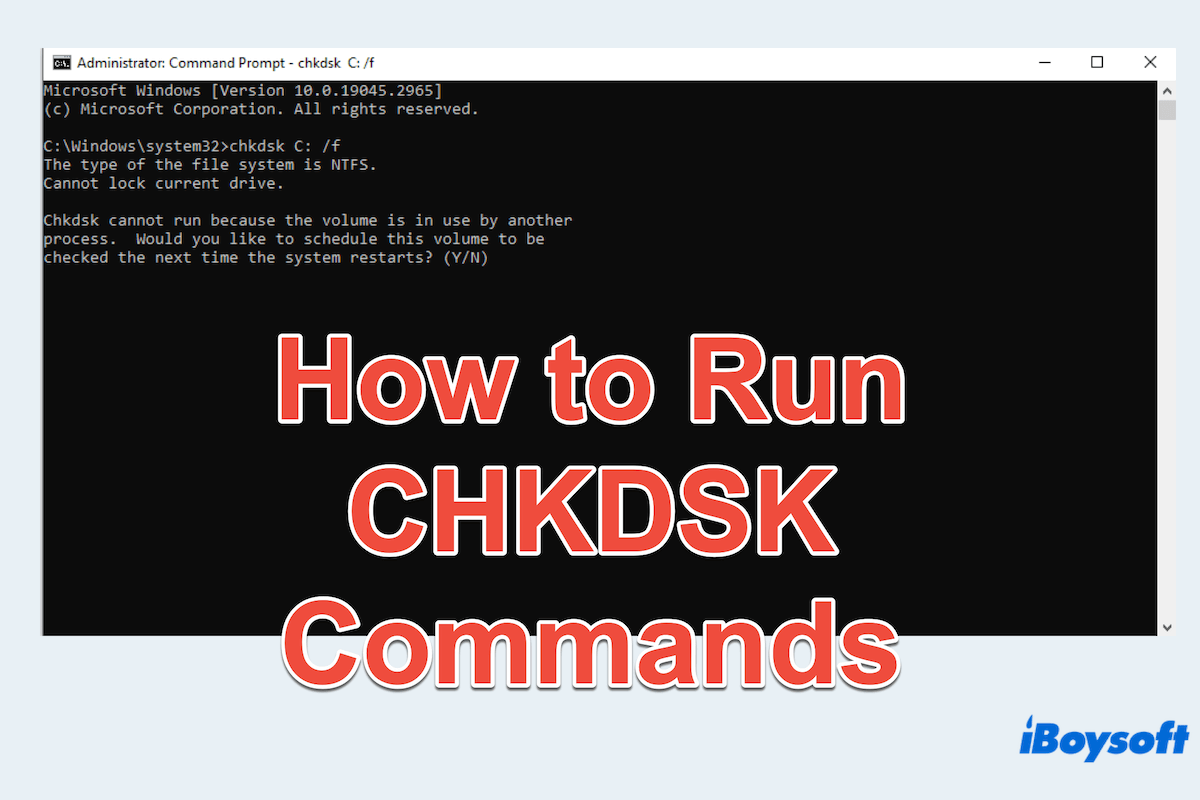
Way 1: Use CHKDSK with the command prompt
- Press Win+X and select Command Prompt, then choose Run as administrator.

- Enter the drive letter you want to scan and type the CHKDSK commands.
- Press Enter to start the scan.
If you are scanning the system volume(usually C), Windows may prompt you to schedule the scan at the next reboot if the volume is in use.
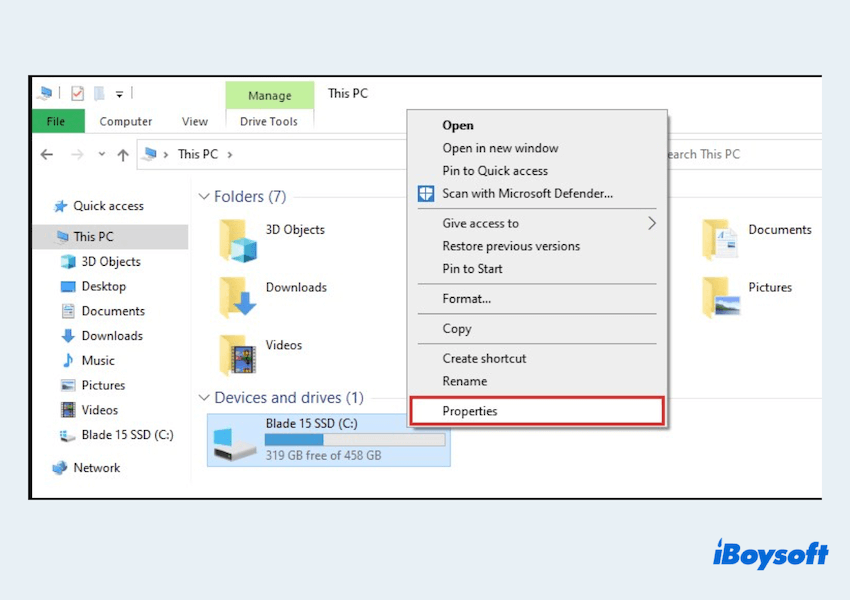
Way 2: Use CHKDSK with File Explorer
- Open File Explorer and choose This PC.
- Right-click on the wanted drive and choose Properties.
- Click Tools > Check.
- Click Show Details to see errors that were fixed during the scanning.
Way 3: Use CHKDSK with an installation media
Before this way, you have to prepare a bootable USB flash drive or DVD containing the Windows installation files, You can download the Windows installation media creation tool from the official Microsoft website and follow the instructions to create the installation media.
- Insert the bootable media into your computer.
- Restart your computer and enter the BIOS or UEFI settings.
- Configure the boot order to prioritize booting then save the changes and exit.
- After the installation screen appears, choose language...then click Next > Repair your computer.
- Choose an option > Troubleshoot > Advanced options > Command Prompt.
- Follow the steps of the Way 1.
Share these ways for how to run CHKDSK on your PC to help more people.
In conclusion, knowing the command CHKDSK commands and how to run them on Windows is essential for maintaining the health and performance of your computer's storage.
By utilizing CHKDSK regularly, you can identify and fix potential disk errors before they escalate into more significant issues. Hope you will never happen to meet these errors.