
Written by
Amanda Wong
Complete Guide: Fix WD My Passport Read-only on Mac
Summary: This article concludes the three most common reasons why your WD My Passport external hard drive read-only on Mac. Free download iBoysoft NTFS for Mac to solve read-only NTFS-formatted WD hard drive on Mac.
Table of Contents:
- 1. Why is the WD My Passport read-only?
- 2. Scenario 1: Your WD My Passport hard drive is NTFS-formatted
- 3. Scenario 2: You have read-only permission to access the WD My Passport hard drive
- 4. Scenario 3: Your WD My Passport hard drive is corrupted
- 5. FAQs about WD My Passport read-only on Mac
Western Digital is one of the most popular hard drive manufacturers. Its product line covers WD My Passport, WD Easystore, WD My Passport Ultra, WD My Book, WD Elements, WD My Passport for Mac, and more. In the WD Easystore vs. My Passport comparison, WD My Passport external hard drives are the more widely used. You may want to transfer files to WD My Passport from Mac. However, many users complain their WD My Passport has a read-only file system on Mac as the user below in the WD community.
"I have a WD My Passport 320GB external hard drive that I am trying to hook up to my iMac for the first time. I'm running macOS 10.13. I'm extremely frustrated because this drive is in a read-only mode, and I can't figure out how to change it! Any suggestion to fix this?"
Please continue reading and look for solutions for solving the read-only WD My Passport on Mac problem.
You can share this post to help more people to solve this question.
Why is the WD My Passport read-only?
Sometimes, the WD external hard drive is read-only on Mac when you just got a brand new WD external hard drive. In other times, it suddenly became read-only after you have been using it for a while. The most common reasons for a read-only WD external hard drive, like WD My Passport, are listed below:
- 1. Your WD My Passport hard drive is NTFS-formatted
- 2. You have read-only permission to access WD My Passport hard drive
- 3. Your WD My Passport hard drive is corrupted
If you are not sure which reason has caused your Mac external hard drive read only, check the scenarios one by one. If you know the reason already, you can jump to the scenario that best describes your situation.
Scenario 1: Your WD My Passport hard drive is NTFS-formatted
For WD My Passport Ultra and WD Elements, check if the hard drive is formatted with NTFS file system. By default, macOS can read NTFS drive on Mac or drive in read-only mode. You can view the files saved on the NTFS-formatted partition or drive but can't make any changes to them. In addition, the WD My Passport hard drive won't let you add any files to it. To check if your WD My Passport is NTFS formatted, follow the steps:
- Go to Finder > Applications > Utilities > Disk Utilities.
- Click the WD My Passport (you may have changed its name) at the left sidebar. The file system information will be displayed on the right.
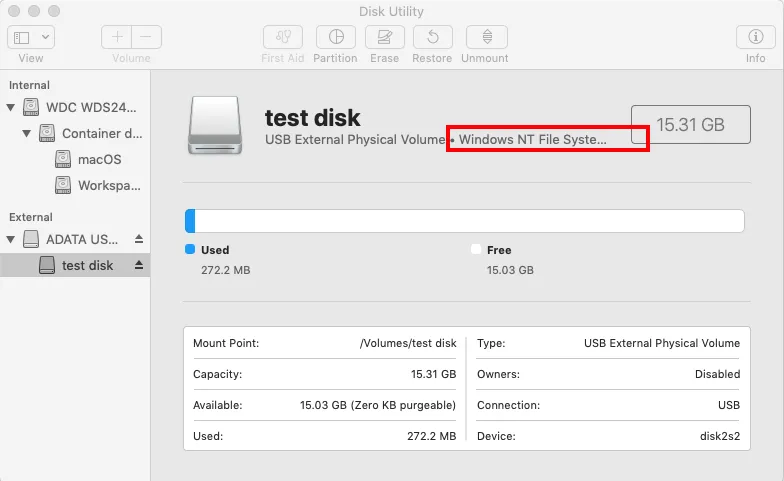
Note: You can also right-click the disk icon on the desktop and choose "Get Info" to check the file system information.
After having confirmed that the WD My Passport is formatted with NTFS, many people will choose to reformat the WD My Passport hard drive to make the WD external hard drive compatible with Mac. But as you know, directly formatting WD Elements or My Passport on Mac causes data loss.
In fact, installing a WD NTFS driver for Mac is a much easier way.
Solution: Install an NTFS for Mac driver to make WD My Passport writable
Mac NTFS free drivers like iBoysoft NTFS for Mac can help you read and write to NTFS-formatted WD My Passport drives on Mac.
iBoysoft NTFS for Mac: NTFS for Mac driver and more
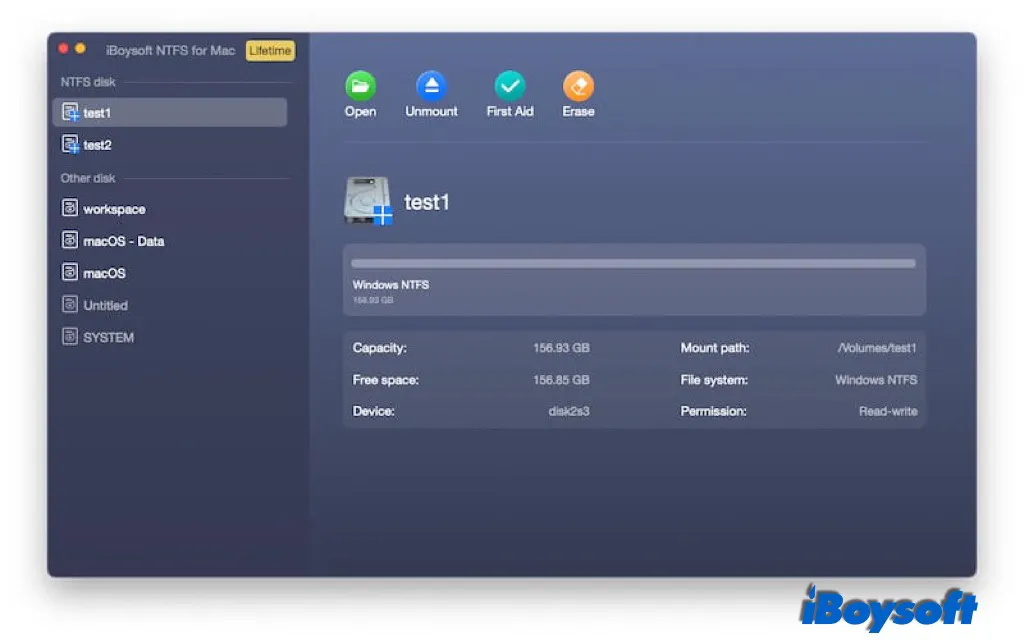
iBoysoft NTFS for Mac is an NTFS disk management tool. It can manage NTFS drives with NTFS write support. It can easily and effectively mount NTFS drive on Mac automatically in read-write mode. It works with macOS 14 Sonoma/13/12/11/10.15/10.14/10.13 and Apple M1, M2 and Intel-based Mac.
Three simple steps to read and write to NTFS-formatted WD My Passport drive easily.
- 1. Download, install and launch iBoysoft NTFS for Mac on your Mac.
- 2. Connect the NTFS-formatted WD My Passport drive to Mac.
- 3. Write to NTFS-formatted WD My Passport drive after the drive has been mounted successfully.
Note: Can't read and write to your NTFS disk after installing the software? Follow the pop-up to install an NTFS driver by iBoysoft and enable System Extensions. Then, you can read and write to the NTFS volumes.
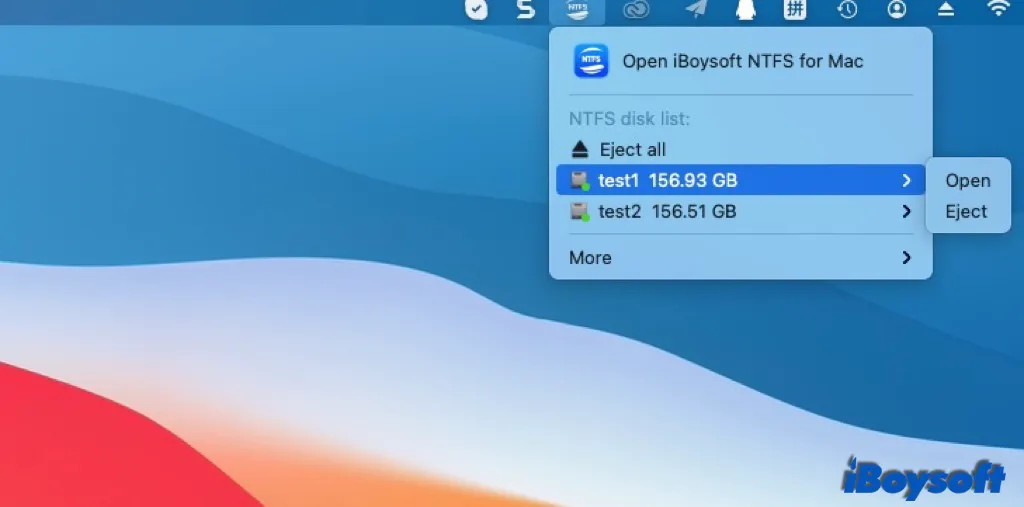
Besides an NTFS mounter, iBoysoft NTFS for Mac can also open, unmount, eject, erase and repair NTFS volumes. It can list all attached external disks including USB flash drives, sd cards, memory sticks, external hard drives and so on. You can open them with one click. Moreover, you can reformat them to NTFS with iBoysoft NTFS for Mac if you need.
Are you trapped in this scenario too? Share the solutions with more people!
Scenario 2: You have read-only permission to access the WD My Passport hard drive
If your WD My Passport external hard drive is not formatted with NTFS but you have no write permission to it, it is probably because you have read-only permission to access the WD My Passport. Since your WD external hard drive is write-protected, all your write access is denied.
To know your permission to the WD My Passport, follow the steps below:
- Right-click the WD My Passport disk icon at the desktop and choose "Get Info".
- Check the information at the bottom under the Sharing & Permissions tab.
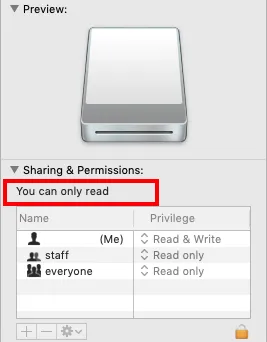
If you can see the message "You can only read", then you will understand why you can't write to your WD My Passport drive.
Solution: Change read-only permission on the WD My Passport drive
Follow the instruction below to change permission on Mac so that you can access the WD My Passport again:
- 1. Click on the lock icon at the right corner in the Get Info window.
- 2. Enter the password if asked.
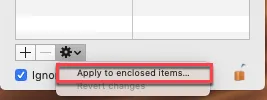
- 3. Check the "Ignore ownership on this volume".
- 4. Click on the gear button and choose "Apply to enclosed items…".
- 5. Click "OK" when you are asked to confirm the operation.
- 6. Click the "Read Only" in the Privilege column and select "Read & Write".
By now, you have regained the read and write access to the WD My Passport.
Scenario 3: Your WD My Passport hard drive is corrupted
If you are sure that the read-only WD My Passport is not caused by the NTFS file system nor read-only permission, another possible cause might be disk corruption. When an external drive is corrupted, people suddenly have trouble reading or/and writing to the disk. Then you will have to fix the corrupted WD My Passport external hard drive to make it writable again. We will introduce two solutions here:
- Fix the read-only WD My Passport in Disk Utility on Mac
- Reformat the WD My Passport on Mac
Solution 1: Fix the read-only WD My Passport in Disk Utility on Mac
This solution might help you solve the read-only external hard drive problem without formatting. You will utilize a built-in tool on Mac called Disk Utility. It is used to manage internal and external disks on Mac. There is a function called First Aid in Disk Utility that can be used to check for and repair errors on the selected disk or volume.
Here is how to fix the read-only WD My Passport in Disk Utility:
- 1. Go to Finder > Applications > Utilities > Disk Utility.
- 2. Select the WD My Passport drive at the left sidebar.
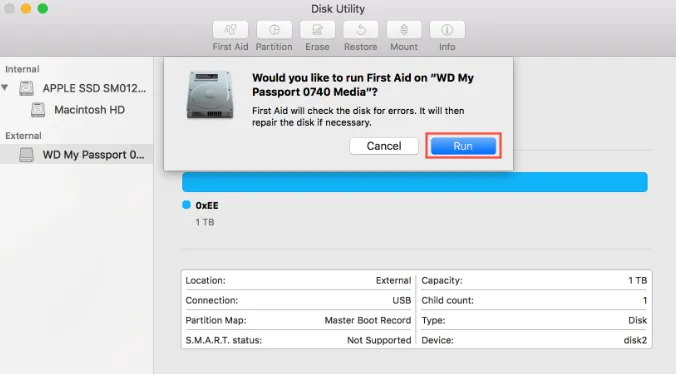
- 3. Click on First Aid and click on "Run" to repair the WD My Passport drive.
- 4. Click "Done" after the operation completes.
If First Aid fails to repair the WD external hard drive, your disk might be seriously corrupted. You will have to reformat the WD My passport to make it not read-only.
Solution 2: Reformat the WD My Passport for Mac
Reformatting the WD My Passport for Mac is the ultimate solution for fixing the read only file system on Mac. Follow the steps below to know how to make the WD My Passport compatible with Mac and PC.
- 1. Make sure you have a copy of your important files on WD My Passport hard drive, or recover lost data from the external hard drive for free with iBoysoft Data Recovery for Mac.
- 2. Go to Finder > Applications > Utilities > Disk Utility.
- 3. Click on the WD My Passport drive at the left sidebar.
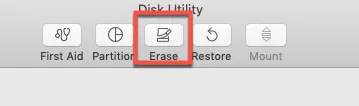
- 4. Check Click "Erase" on the top of the Disk Utility window.
- 5. Input a name.
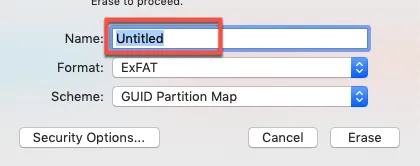
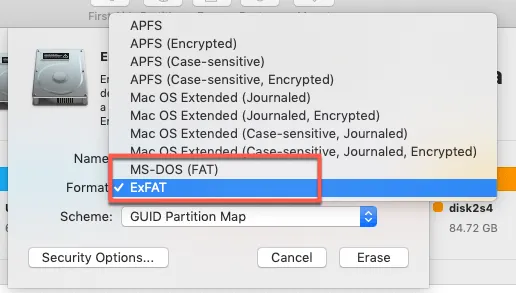
- 6. Choose FAT or exFAT as the format for convenience because either of them is compatible with both Windows and macOS. Then, how to format the WD My Passport for Mac exclusive use? Simply choose APFS or Mac OS Extend format in Disk Utility, which also works if you want to format WD Elements for Mac.
- 7. Choose "GUID Partition Map" as Scheme.
- 8. Click on the "Erase" button.
You can reconnect the WD external hard drive to Mac again to see if it is writable now.
Problem solved? Share your happiness with others!
How to Fix USB Drive is Read Only Mac Error [Updated in 2023]
This article provides you with five feasible solutions to help you fix the USB drive is read only Mac error. Also, it explains why your USB drive becomes read only on Mac. Read more >>
Conclusion
The external hard drive read-only on Mac problem doesn't happen to WD external hard drives only. Any external hard drive could be write-protected on Mac. It is quite common to see other notable external hard drive brands get the same complaint like Seagate, Samsung, Toshiba, etc. When you come across the read-only disk problem on Mac, the post is always helpful.
If you lost the data from WD My Passport hard drive, iBoysoft Data Recovery software is highly recommended to recover your data.
FAQs about WD My Passport read-only on Mac
A
Read-only My Passport drive could be caused by the NTFS file system on the drive, read-only permission to access the drive, and hard drive corruption.
A
For different scenarios, the corresponding solutions vary. If it is an NTFS-formatted drive connected to your Mac, you can use iBoysoft NTFS for Mac to gain full read and write access to the NTFS WD drive. If you have only read-only permission to the drive, contact the administrator to change permission on the external drive to allow you to read and write to the drive. In case the drive is corrupted, try to repair it with Disk Utility's First Aid or reformat it.
A
If your user account is not an admin user, you might need to enter an admin username and password after using the padlock to unlock the permissions settings. To make the update effective, your Mac might also need to be restarted.
A
No, you can't. Even the latest macOS Sonoma only supports reading NTFS drive, and it has stopped providing support for end-users manually turning on NTFS write functionality in macOS, thereby blocking all open-source NTFS for Mac drivers. You can rely on paid NTFS driver for Mac like iBoysoft NTFS for Mac to be able to write to NTFS drive.