
Written by
Jenny Zeng
How to Install Windows 10 on Mac with Boot Camp Assistant?
Summary: This post compares the major ways - Boot Camp Assistant vs. Virtual Machine software - to install Windows on Mac and tells you how to use Boot Camp Assistant to install Windows 10 on Mac and switch between Windows and macOS.
It's arguable to say which one is better, Mac or Windows, but the good news is that you can have the best of both sides with some effort. You can even install Windows 10 on Mac without any charge. With Windows installed on Mac, you can open MSG files on Mac, run Windows app on Mac, etc.
The best free way to install Windows on Mac is using Apple's built-in Boot Camp Assistant. If you are looking for a free solution to run Windows programs on Mac that's less likely to have performance issues, this post is for you.
Boot Camp Assistant Vs. Virtual Machine Software
You can install Windows 10 on Mac using three ways:
- Use Boot Camp Assistant
- Employ a third-party virtual machine for Mac software
- Utilize emulators such as Wine or CrossOver Mac
How to Run Windows Programs on Mac? (Including Freeware)
This article lists five ways to run Windows 10 on Mac and explains each option's pros and cons. Read more >>
The first two are major methods used by Mac users, and Boot Camp Assistant is the best go-to provided by Apple. Since Boot Camp Assistant is an original utility on your Mac, it's comparably safer to use.
Unlike third-party virtual machine applications, it allows you to install Windows on Mac completely so that you can run macOS or Windows on your Mac with utmost performance. Like running macOS, your Mac will allocate all of the resources to Windows applications. Thus, Boot Camp Assistant is the best idea for playing games and RAM-demanding software such as video editor and 3D graphics.
Virtual Machines mimic the Windows environment to install Windows OS on it and Windows-only apps on the OS. It allows you to run macOS and Windows at the same time, but doing so will influence the performance of your Windows apps.
The only drawback of Boot Camp Assistant is that you can't use macOS and Windows simultaneously like virtual machine software but require a restart to switch between.
Step 1: Preparation before Installing Windows 10 on Mac with Boot Camp Assistant
Before we get started, look through the following checklist to see whether your Mac is ready to install Windows 10 on it.
1. Ensure that your Mac is compatible with Windows 10.
Mac Models compatible with Windows 10:
MacBook (2015 and later)
MacBook Pro (2012 and later)
MacBook Air (2012 and later)
iMac Pro (All models)
iMac (2012 and later)
Mac mini (2012 and later)
Mac Pro (2013 and later)
2. You will need an extra USB flash drive with at least 16 GB of free storage to install Windows if your model falls into this list.
Mac Models requiring a USB flash drive: (earlier than OS X El Capitan)
MacBook (before 2015)
MacBook Pro (before 2015)
MacBook Air (before 2017)
iMac (before 2015)
Mac Pro (before 2013)
3. Update your Mac operating system to the latest available. You can check macOS updates from Apple Logo > System Preferences > Software Update > Check Updates.
4. Make sure your Mac is Intel-based. Boot Camp Assistant cannot be used on Macs with M1 Max/Pro chips. If you don't know which chip your Mac is running, click Apple log > About This Mac to view the information.
5. Prepare at least 64GB of free space (Apple suggests 128GB for maximum performance) on your Mac hard drive for Windows installation. You can delete unnecessary files to free up space on Macintosh HD.
6. Installing Windows on Mac with Boot Camp Assistant won't cause data loss with the correct instruction. But you can back up the crucial files in case anything goes wrong.
Step 2: Download the Windows ISO File
You need to download a Windows 10 ISO file from Microsoft's official website. Unless you want to customize the look, you don't need to activate Windows 10 with a product key to use it.
Steps to download Windows 10:
- Visit the Windows 10 download page.
- Scroll down to the Select edition part, click the drop-down menu to select Windows 10, and click Confirm.
- In the "Select the product language" section, choose the preferred language. Click Confirm.
- Click 64-bit Download and then Save.
- The ISO file is now downloading.

Step 3: Launch Boot Camp Assistant to install Windows on Mac
Once the ISO file is successfully downloaded, continue with the steps below.
Install Windows on Mac with Boot Camp Assistant:
- Open Boot Camp Assistant by clicking Launchpad > Other > Boot Camp Assistant.
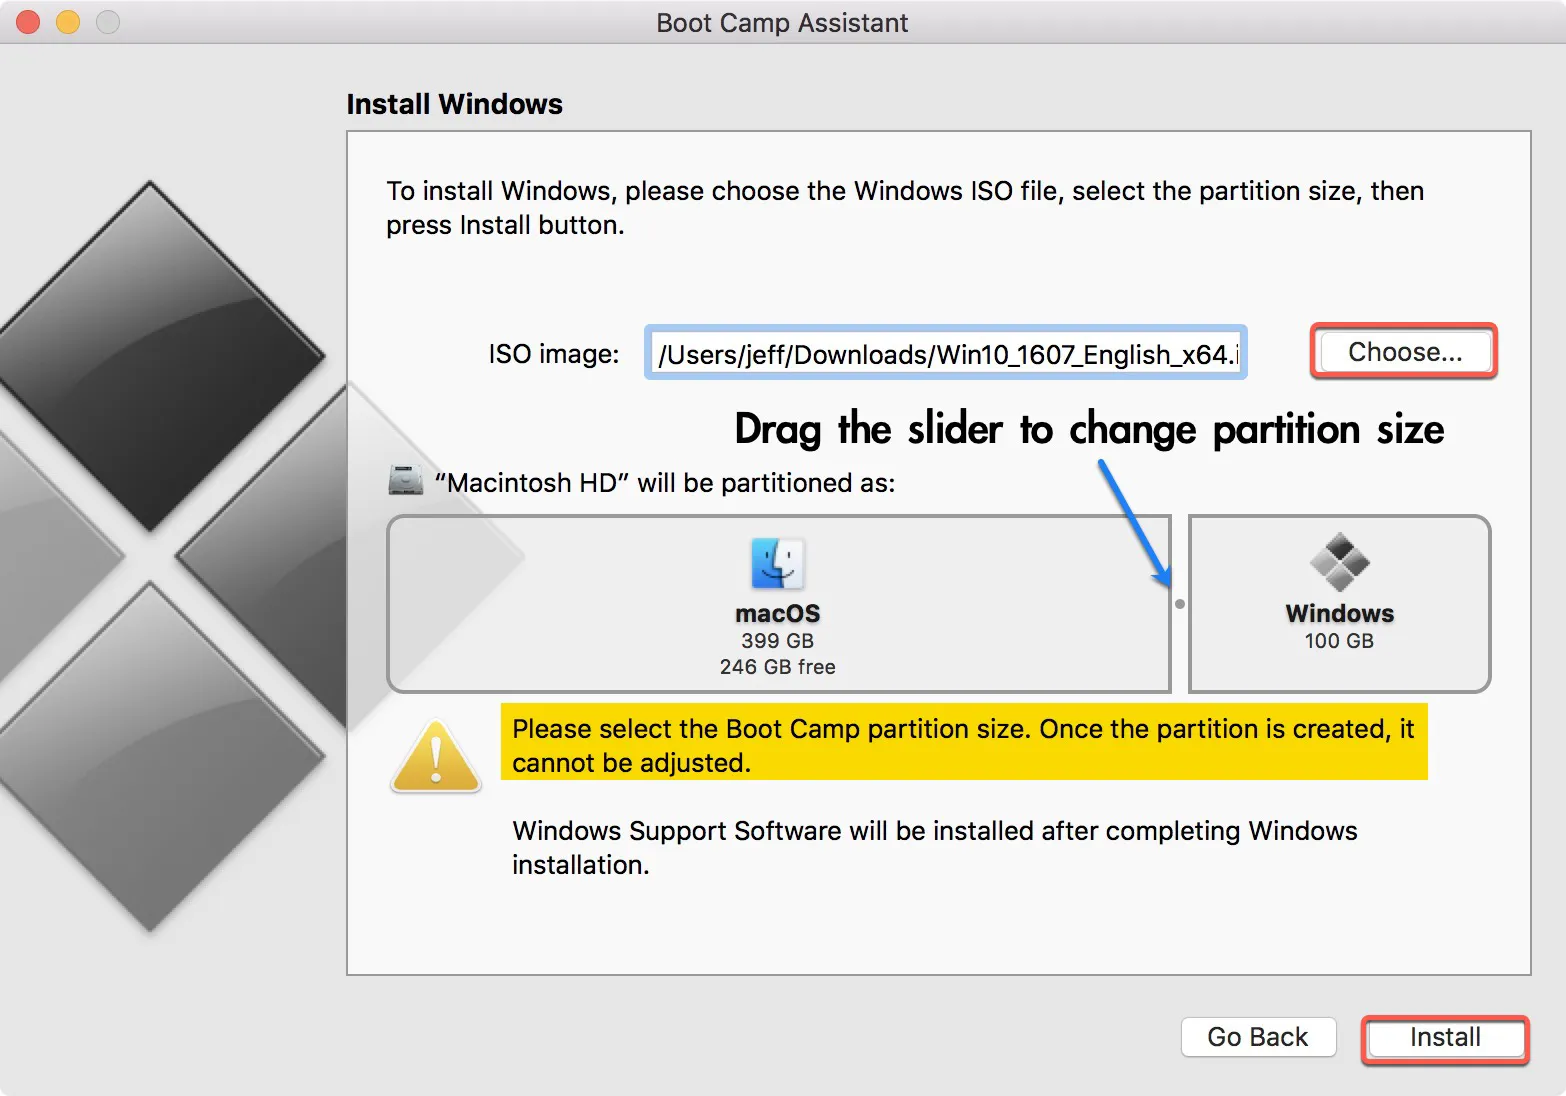
- Click Continue. Boot Camp will automatically locate the ISO file on your Mac. If not, click Choose to find the downloaded file.
- Click and drag the slider to determine the Windows partition size. Again, leave at least 64 GB for Windows. (The ISO file will take 5.4 GB.) While thinking about how much storage you will need for Windows apps, don't forget to leave enough space for macOS.
- Click Install. Now Boot Camp Assistant will start to create a Windows partition and download Windows support software.
- Type your password and click OK. Then your Mac will restart and show you the Windows 10 setup screen.
- Choose the language and click Install Now.
- Click on "I don't have a key."
- Click Windows 10 Home if you are like most users who don't need the features in Windows 10 Pro, click Next, then follow the wizard.
- Click Customize to set the personalized settings, then click Next. Repeat the process to finish setting up.
- Determine a name and password for your Mac.
- Click Next and choose to use or not to use Cortana. Then wait a while for Windows to boot.
Note: Carefully choose the partition size because you can't change it once you install Windows.

How to Fix Boot Camp Stuck on Partitioning Disk?
This post tells you how long Boot Camp needs to partition a hard drive and what to do when Boot Camp is stuck on "Partitioning disk.". Read more >>
Step 4: Install Boot Camp Installer on the Windows Partition.
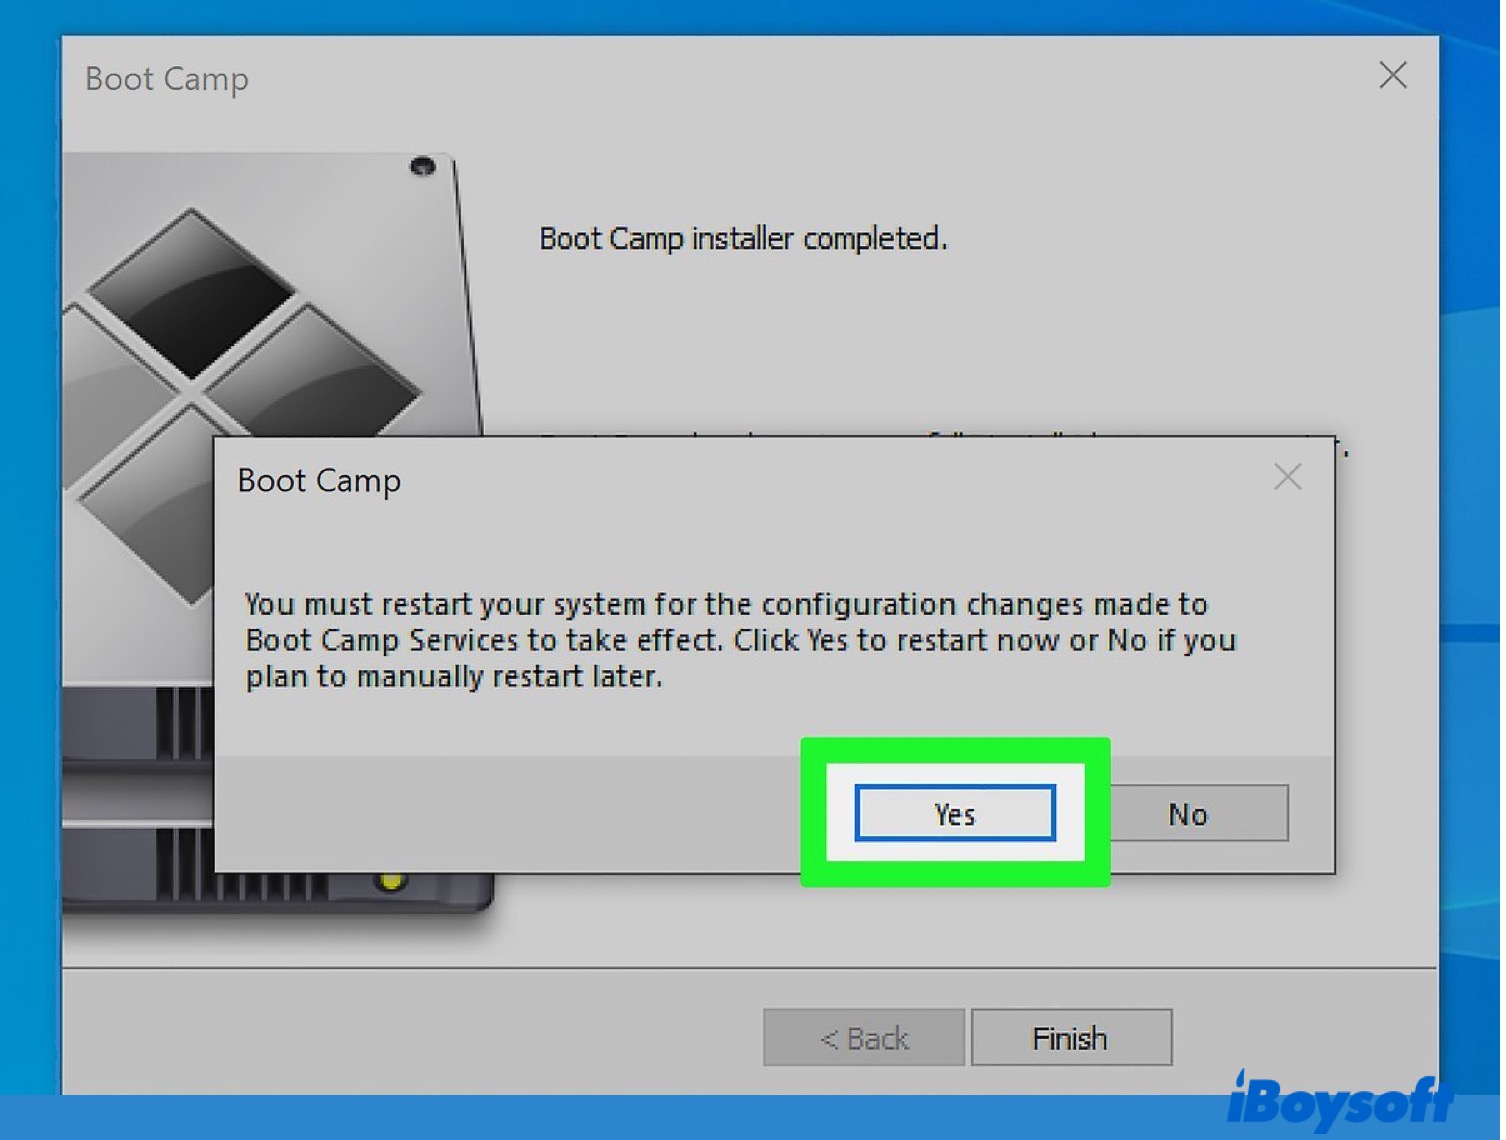
- When seeing the Boot Camp installer window, click Next to install the necessary driver for Windows to work on your Mac.
- Agree to any pop-up until you see Finish. Click Finish to reboot. Your Mac will log into the Windows account you set up before automatically.
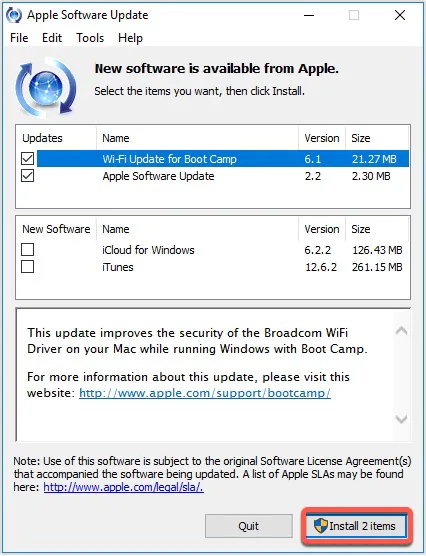
Step 5: Update Apple Software and Windows (Optional).
- Connect with a Wi-Fi. Then click the Start button >Apple Software Update, and install any other additional updates your Mac offers.
- Click Yes to reboot your Mac.
- To ensure that Windows runs efficiently, you can update Windows to the latest available on your Mac. Click Start menu > Settings > Updates & Security > Windows Update. Windows will check updates and download them automatically if any are available.
- Updating Windows will take a while. Once it's done, click Restart to load Windows. Now, you are ready to go.
Step 6: Switch to macOS from Windows 10
Besides being safe, free, and great for demanding software, another benefit of using Boot Camp Assistant is how easy it is to switch between macOS and Windows.
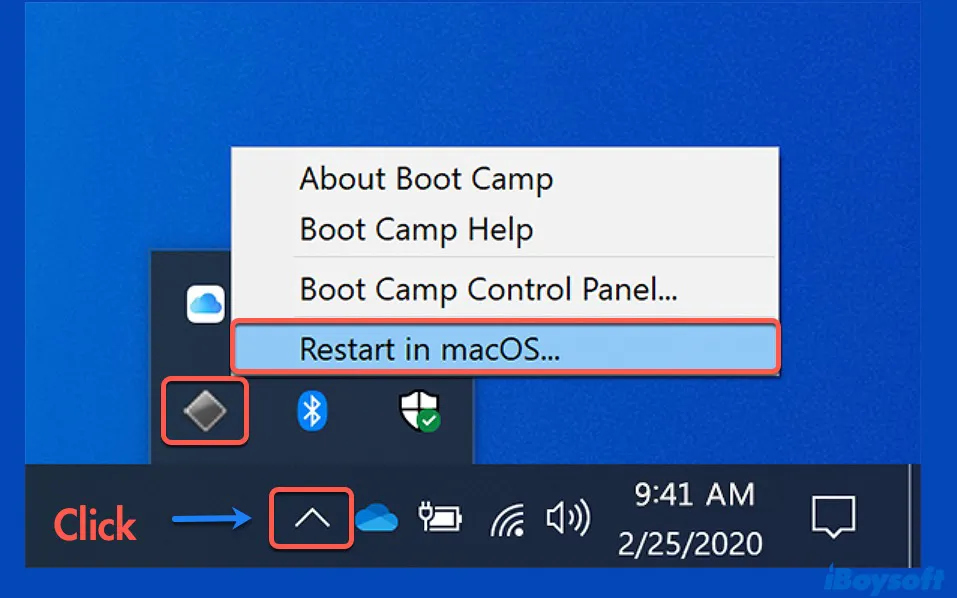
To switch from Windows to macOS:
- Click the ^ symbol on the right side of the Windows taskbar, then tap on the Boot Camp icon.
- Click Restart in macOS in the pop-up. Your Mac will restart and boot into macOS right away.
If you want to go back to Windows, you can restart your Mac and hold down the Option key once the screen turns black. Release the Option key when a boot menu asks you to choose a startup partition. Choose Windows.
Also read: