
Written by
Vain Rowe
A Beginner's Guide On How To Use TestDisk&PhotoRec
Summary: This post is for the people who wanna try TestDisk&PhotoRec to perform free TestDisk&PhotoRec data recovery while knowing nothing about it. Moreover, an alternative to TestDisk&PhotoRec is also included in this article. if you have more questions about data recovery, please visit our website iBoysoft for more information.
Some users have an interest in TestDisk&PhotoRec for the reason that it is open-source and free to use. While it's tough to figure out how to work with it since it has no user interface but a command line window design.
Feel no worry, this post will present you with a comprehensive guide to knowing it and how to use TestDisk&PhotoRec to recover deleted/lost files for free.
The TestDisk&PhotoRec data recovery basics

Created in 1998, TestDisk is totally free and open-source and it is distributed under the GNU General Public License v2 and later. While PhotoRec, the companion of TestDisk, was created in 2002 for media file recovery. Examples include SD cards and other removable media.
TestDisk is a powerful toolset in file system repair and file recovery. It works fabulously in data recovery on the following file system with already-prepared archives:
- macOS/Mac OS (PowerPC or Intel)/OS X
- DOS (32-bit x86)
- Microsoft Windows (32-bit x86 or 64-bit x64)
- Linux (32-bit x86 or 64-bit x64)
- Marvell 88F628x Linux
Apart from data recovery, TestDisk does fabulously in partition recovery as well due to its excellent functionality in disk partition recognization. It does a quick check of the disk's structure and compares it with the partition table for entry errors and then searches for lost partitions to perform the recovery without a hitch.
- Apple Partition Map
- GUID Partition Table
- Humax
- PC/Intel Partition Table (Master Boot Record)
- Sun Solaris slice
- Xbox fixed partitioning scheme
This article is a full review of a free data recovery software called TestDisk. It answers your question "Is TestDisk safe to use?" You can also learn its main features, performance, pros & cons, and best TestDisk alternative.
If you find this article informative, please share it to let more people know!
How to use TestDisk to recover deleted/lost files?
When a file is deleted, the list of disk clusters occupied by the file is erased, marking those sectors available for the user by other files created or modified then. If the file wasn't fragmented and the clusters have been reused, TestDisk can recover the deleted file successfully.
Follow to read how to download and install TestDisk on a PC:
Downloading TestDisk is quite an easy task while archiving software is necessary to open the TestDisk package for it comes in the RAR file format. For data recovery, you need to have the administrative privilege of the device you're running.
- Go to the TestDisk download page and click on the Windows target link to download the RAR file.
- Launch the unarchiver to unpack the TestDisk package and you are all set.
- In the console window, you'll be asked to create, append, or not create a log file. Choose the option you want to with the arrow keys and hit the Enter/Return key to confirm your choice.
- You need to select the storage media on the next screen.
- Use the arrow keys to navigate and select the hard disk drive. Generally, TestDisk will list all the exact model names of the hard drive and the storage size to help you make out.
- You need to choose a partition tab type. Pick the option that is highlighted by default and then press Enter.
- Use the arrow keys select Advanced and press Enter.
- TestDisk will list all the partitions of your PC and you can find the partition's name in square brackets.
- Use the up and down arrow keys to select the partition you want to recover data from.
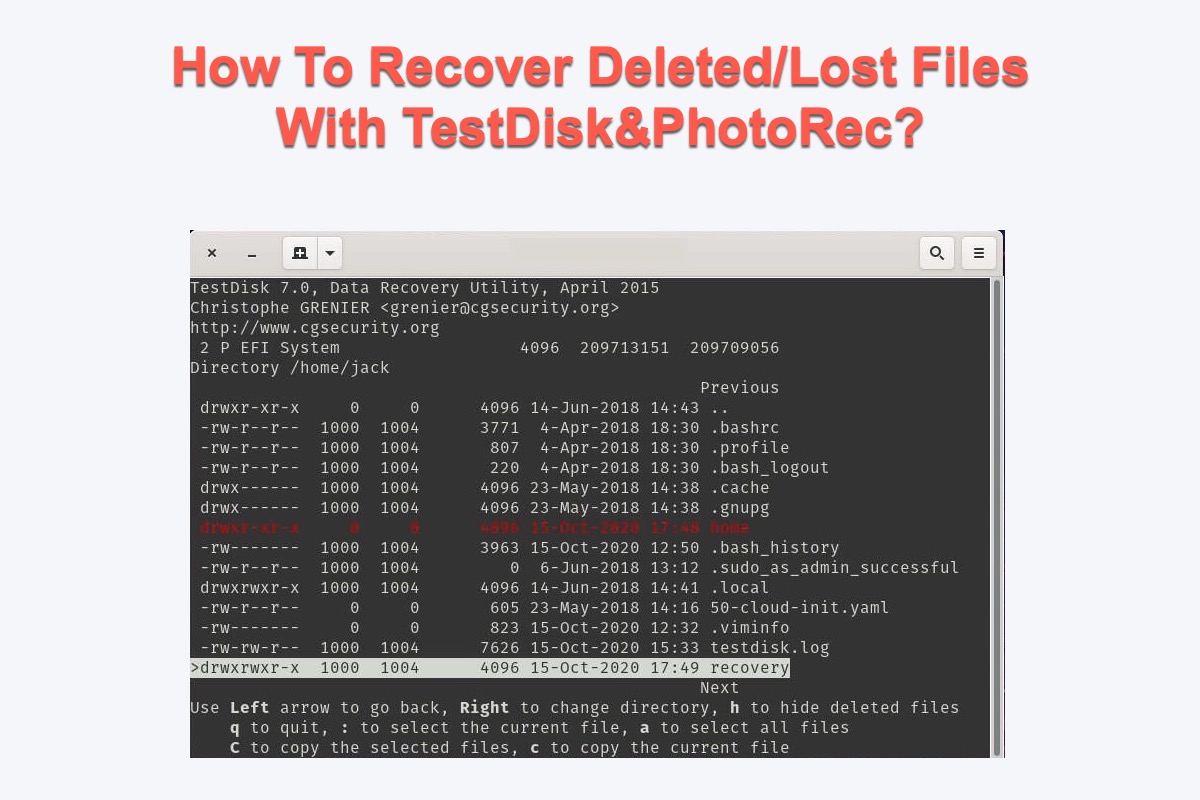
- Use the left and right keys to select Undelete and press Enter.
- Use the arrow keys to navigate through the files and press the ':' sign to select the highlighted files. Or you can press the a button (case-sensitive) to select all the files.
- Press the C (case-sensitive) key to copy the selected files.
- TestDisk will ask you to select a recovery folder and the recovery app will copy the deleted files.
- Use the left arrow key to navigate to the parent directory and press Enter to select a folder.
- Once you got to the desired folder, press C (case-sensitive) to recover the deleted files there.
Why not share this article with more people to let them know such an informative article?
The best alternative of TestDisk data recovery software
As you can see, although being free and open-source, TestDisk is tough to utilize and it is suitable for people who are experienced in computers and command lines. Besides, it does not offer support for macOS APFS data recovery so you must run into a hiccup if you want to launch it for TestDisk/PhotoRec APFS data recovery.
Last but not least, TestDisk hasn't updated the app since 2019 and stopped data recovery support for some operating systems and distributed thereafter.
We, therefore, recommend you an all-in-one data recovery utility that offers support for the most common OS of both Mac and Windows -- iBoysoft Data Recovery Software.
iBoysoft Data Recovery Software is highly criticized for its fabulous ability in disk scanning skills and data recovery algorithms. Aside from normal data recovery, it's able to recover RAW partitions by fixing the RAW file system to a recognizable one on macOS.
It has a user-friendly interface and you can operate it without running command lines with ease. Let's see how to use iBoysoft Data Recovery to recover deleted/lost/ files from corrupted, unreadable, inaccessible, and even failing hard drives.
How to use iBoysoft Data Recovery to recover files on Mac
Step 1: Click the Download button below to install it. It's advisable to install the app to an external hard drive like a USB flash drive to avoid overwriting the disk where data loss happens.
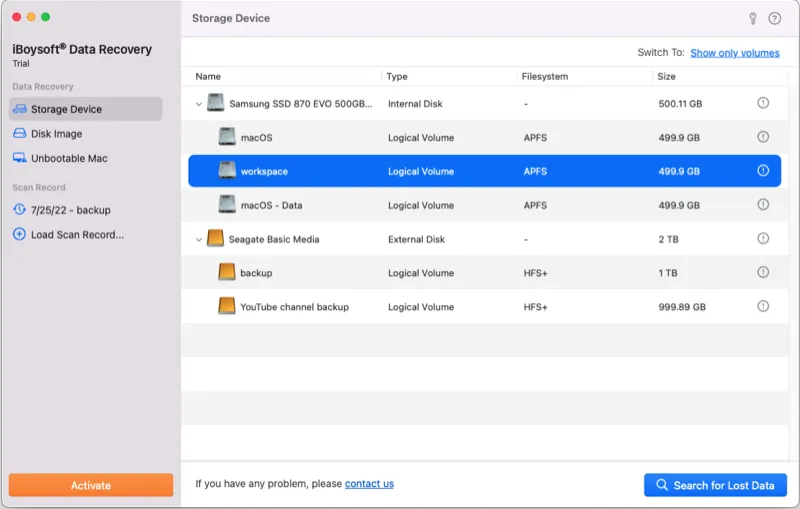
Step 2: Launch iBoysoft Data Recovery for Mac and select the Mac hard drive or the partition where your file was stored.
Step 3: Click Search for Lost Data to begin the disk scanning process.
Step 4: Once the scanning process completes, select the keynote file and select Preview to check it.
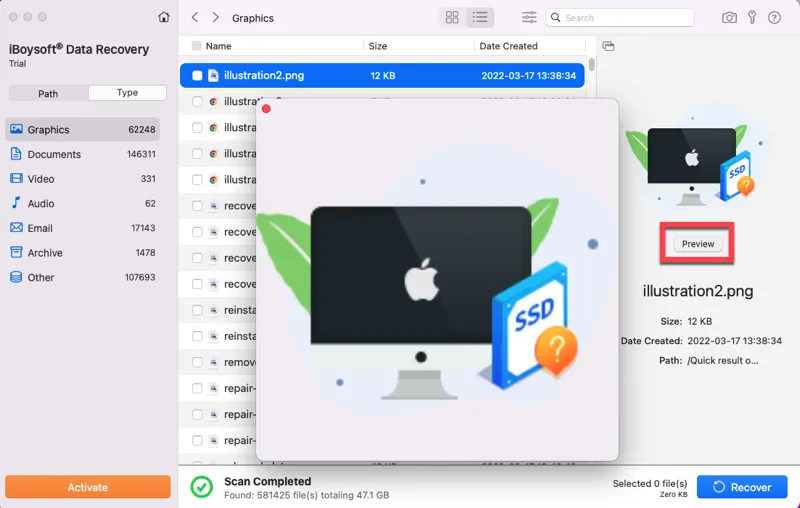
Step 5: Select the keynote file that you want to click Recover to start the restoration process.
It's wise to select a new destination to save your file in avoiding data loss happening again.
How to use iBoysoft Data Recovery to recover files on Windows
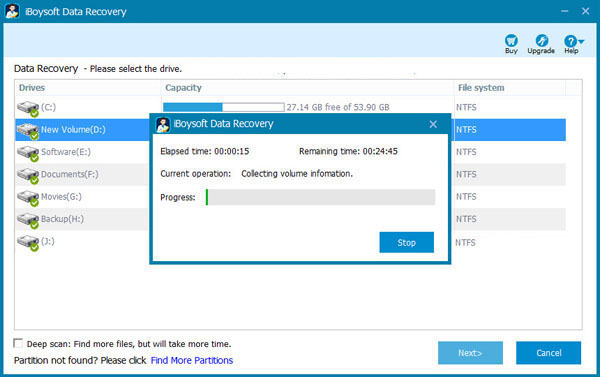
1. Free download, install and launch iBoysoft Data Recovery for Windows on your PC.
2. Connect the drive on which you saved the files to the PC. If you saved the on a local computer drive, skip this step.
3. Select the disk which contained the email files before you deleted or lost them.
4. Click on Next to start scanning for lost files.
5. Click Preview to check the recovered files before recovery.
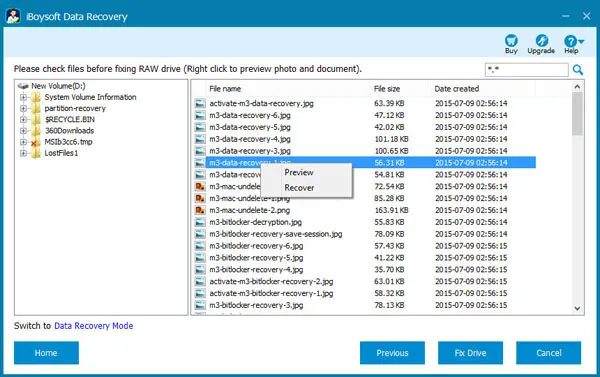
6. Find the files you want, select them, and click on the Recover button. Please save the email files to another location.
Much appreciated if you'd like to share this software and this post with more people!
Wrap up
TestDisk&PhotoRec costs no money to perform data recovery tasks yet only the people who master computers and command lines have the capability to utilize it. If you're curious about it, give it a try. Moreover, the best replacement for TestDisk&PhotoRec is included and it is easy to use.