
Written by
Jenny Zeng
What is Desktop.ini & Can I Delete it?
Summary: This post provides insights into what desktop.ini is and why it appears on your desktop. It also elaborates on whether you should delete the desktop.ini file and potential methods to stop it from recreation.
It's weird to see two desktop.ini files popping up on your Windows desktop. And it's certainly normal to wonder what they are and whether you can delete them. The good news is that the desktop.ini file is not a virus. Also, it can be hidden and possibly stopped from automatic regeneration.
What is desktop.ini?
When you use your Windows PC, you may want to customize the folders' view settings for your convenience, such as changing folder icons, pictures, the localized name, or optimizing the folder for a specific type of data.
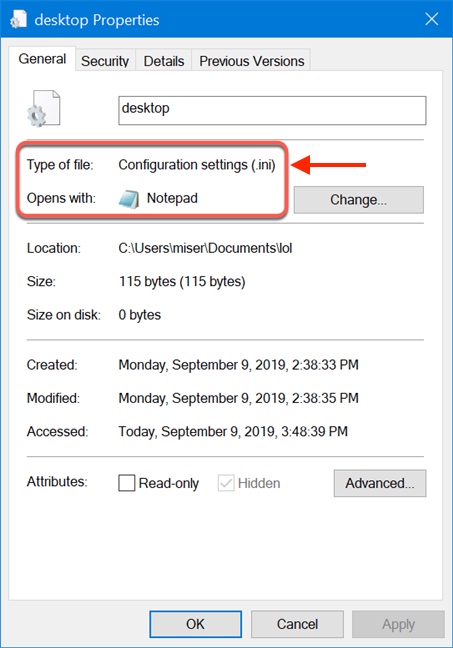
These changes need to be saved somewhere to keep the customization. And this is where the desktop.ini - Window's version of DS_Store - comes in. It's a system file automatically generated by Windows to store changes made to folder settings, hidden by default. If you right-click on a desktop.ini file and choose Properties, you will see the Type of file row that displays Configuration settings.
Unlike what the name implied, the desktop.ini file does not only exist on your desktop. It can be found in any folder on your computer with a customized appearance set to it. You can open a desktop.ini file with Notepad and change its contents. But it's not advisable to modify the texts if you have no idea what you are doing.
Here is one example of what's inside a desktop.ini file:
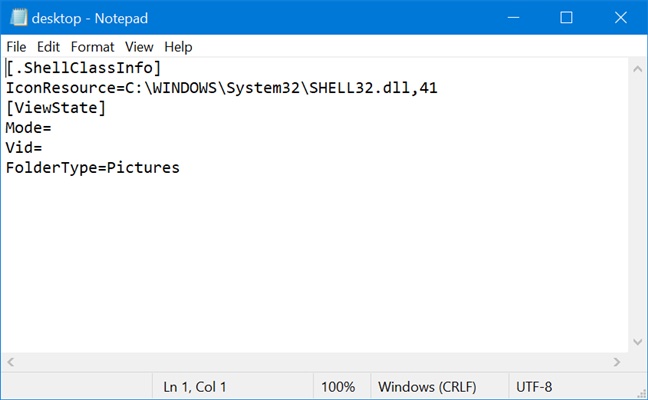
Although each desktop.ini file has different contents, here are some of the major attributes that you might see:
ShellClassInfo - This text is always at the beginning of a desktop.ini file, responsible for initializing other commands and applying changes based on their set value.
Icon file - It's used to change the icon of a folder. If you have a thumbnail file with the .ico extension in the folder you want to customize, you can set it as the folder's icon. For instance, you change the default folder icon to a cat.ico image, and then the text "IconFile=cat.ico" will appear in the desktop.ini file to save the change.
IconIndex - This command is included while setting a custom icon. The value needs to be 0 for the folder icon to work correctly.
ConfirmFileOp - It is a warning code displaying messages like "Are you sure you want to delete this folder?". If you want to get rid of the warning, you can change the value to 0.
InfoTip - This entry is employed to add extra knowledge about the folder you want to display underneath the standard information.
The desktp.ini file is useful when you need to apply the same configuration to another folder. It can be easily done by dragging and dropping the desktop.ini file into the target folder.
Is desktop.ini a virus?
No, the desktop.ini file is not a virus. But some viruses may exploit the capabilities of the desktop.ini files. Be cautious when you set Windows not to reveal hidden files and protected operating system files, but the desktop.ini file still shows up. In that case, your computer may be infected by malware, and you should scan it with anti-virus software.
Why does desktop.ini appear on your desktop?
As we stated before, the desktop.ini files are usually hidden. When you see them suddenly appear on your desktop or other folders, you must have reset them to do so. Likely, you have accidentally configured your PC to show hidden files when you were editing File Explorer's settings or running an anti-virus program.
Why are there two desktop.ini files on your desktop?
In general, if you alter a folder's display, a desktop.ini file will be automatically generated to save the change and any other modifications made after. So there's typically one desktop.ini file in one folder. Except for the desktop, it presents two desktop.ini files.
To get to the bottom of this, you need to understand how your desktop works.
When you switch to or log into a different Microsoft account, you start up to a different desktop but with some items unchanged. These items remain on every account are stored on a public desktop folder, located at Windows (C:) > Users > Public > Public desktop. However, the documents or apps unique to the user are kept in another desktop folder, the user's desktop (Windows (C:) > Users > user name >Desktop).
That's to say; your desktop is a combination of two desktop folders. Since each folder has a configuration file, it's not hard to see why there are two desktop.ini files on the main desktop.
Can I delete desktop.ini?
Yes, you can delete the desktop.ini file from any directory if you are sure that won't affect your experience.
Although users are posting that they notice no change to the PC's appearance after deleting the two desktop.ini files on the desktop, we recommend you keep those generated by your system without you making any changes. Because they don't take up much space and removing them may cause other unexpected issues.
For those desktop.ini files created after you altered a folder's display, deleting them will do no harm but restore folders' view settings to the default. If you decide not to have the customized configuration, you can right-click on it and click Delete to move it to Recycle Bin. Or select the desktop.ini file and press Shift + Delete keys to remove it permanently.
Can I hide desktop.ini?
If you don't want to see the desktop.ini files, the best solution is to hide them. The steps to make the desktop.ini file invisible vary slightly on different computer operating systems.
How to hide desktop.ini files on Windows 10 & Windows 11?
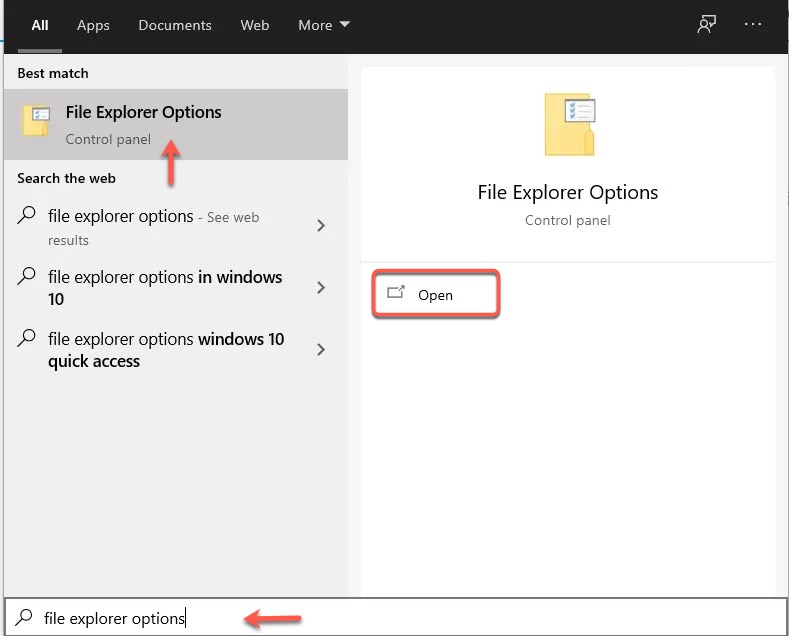
- Locate the search field from the taskbar.
- Enter File Explorer Options, and press Enter to search for it.
- Select File Explorer Options, then click Open.
- Click on the View tab.
- Under the Advanced settings, check Don't show hidden files, folders, or drives & Hide protected operating system files (Recommended).
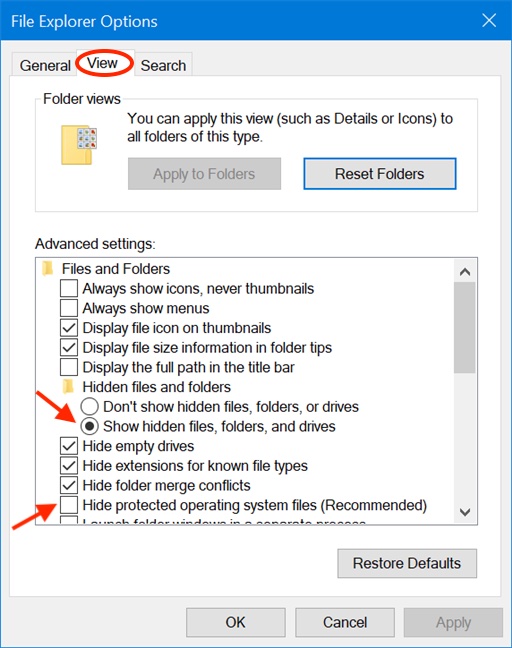
- Click Apply > OK.
How to hide desktop.ini files on Windows 7?
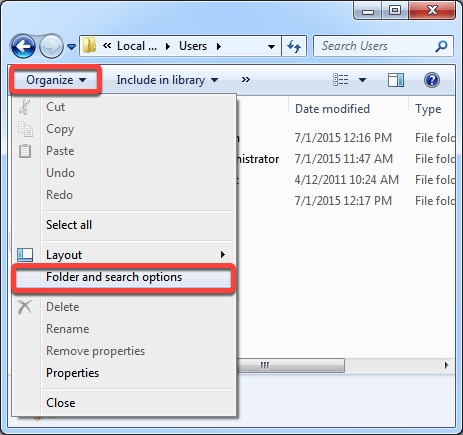
- Hold Windows + E keys.
- When a window pops up, click Organize on the top-left corner.
- Choose Folder and search options from the drop-down menu.
- Click the View tab and look at the Advanced Settings section.
- Tick Don't show hidden files, folders, and drives.

- Tick Hide protected operating system files (Recommended).
- Click Apply > OK.
How do I get rid of the desktop.ini pop-up?
Some say that you can't turn off the automatic generation of desktop.ini files as it is how Windows is programmed. But you can take the chance and try the methods described below.
Method 1: Modify the Registry
Changing the Windows registry is a potential fix to stop desktop.ini files from regeneration, but it may pose irreversible damages to your operating system. Therefore, follow these steps carefully.
- Press Windows + R keys to open the Run box.
- Enter regedit, then click OK.
- Once the Registry Editor opens, navigate to the following path:
HKEY_LOCAL_MACHINE\SOFTWARE\Microsoft\Windows\CurrentVersion\Policies\Explorer - Looking for a DWORD value file called UseDesktopIniCache, double-click it and set the value to 0.
- If it doesn't exist, you can create one by right-clicking on the Explorer folder and choosing NEW > DWORD (32-bit) Value, setting the Value name to UseDesktopIniCache and Value data to 0.

- Click OK and exit Registry Editor.
- Restart your PC to put the modification into effect.
Method 2: Stop PC to remember the folder's view settings
It seems like Microsoft somehow cancelled this option on Windows 10, so this only applies to Windows 7. Be reminded that once this option is disabled, Windows won't keep any alterations to a folder's display.
- Hold Windows + E keyboard shortcut.
- Click Organize in the top-left corner.
- Choose Folder and search options from the drop-down menu.
- Uncheck the box before Remember each folder's view settings.
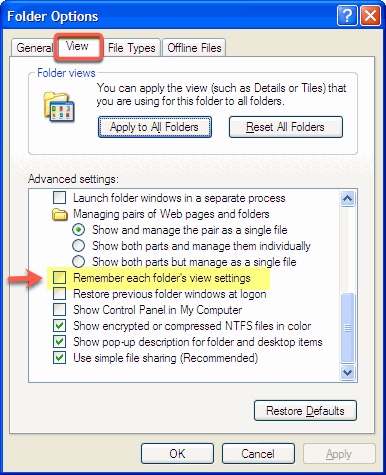
- Click Apply > OK.